
Setting up the alpha channels in 3ds Max
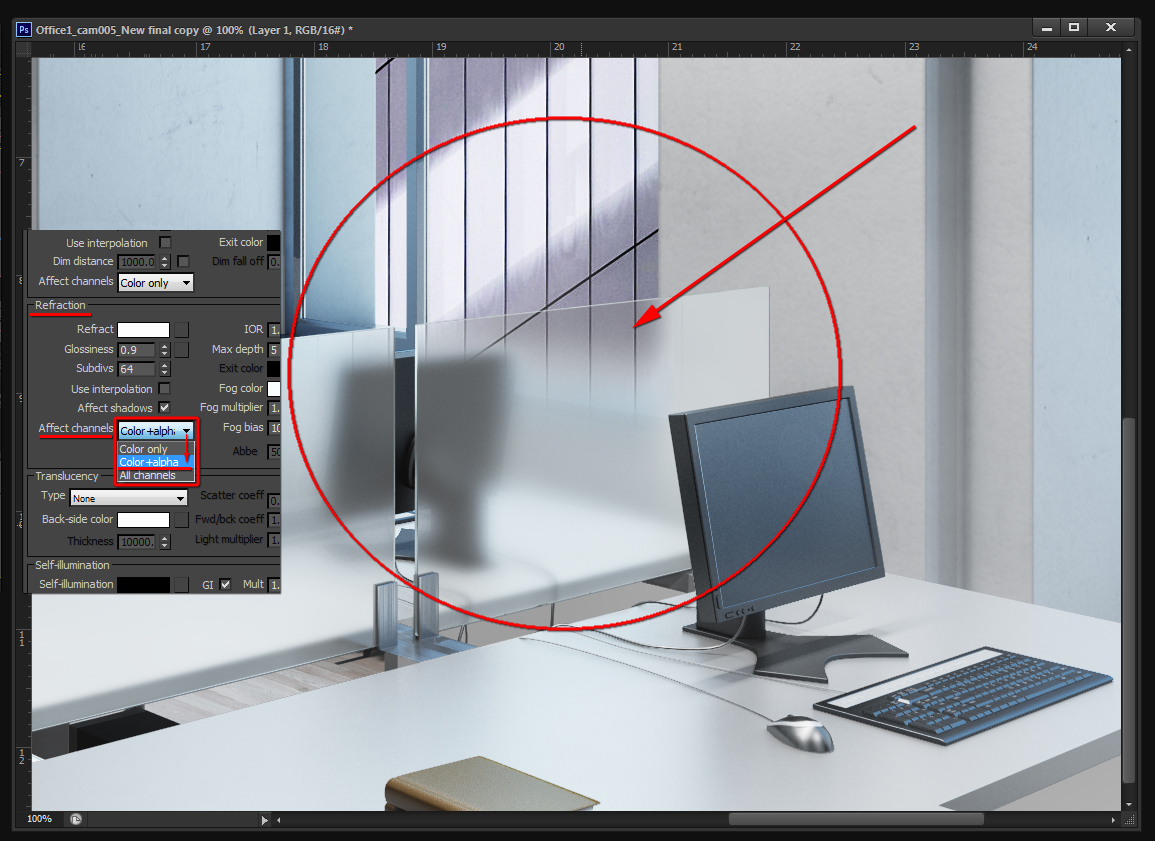
To ensure background images can be fully integrated with your render in post; it’s crucial to enable transparent/refractive material options such as the, Color+alpha , in the Refraction Affect channels function.
This function allows background images to be seen through transparency/translucency, in post.

Choose the color+alpha option
Following that, add render elements such as the Alpha render element , and render.
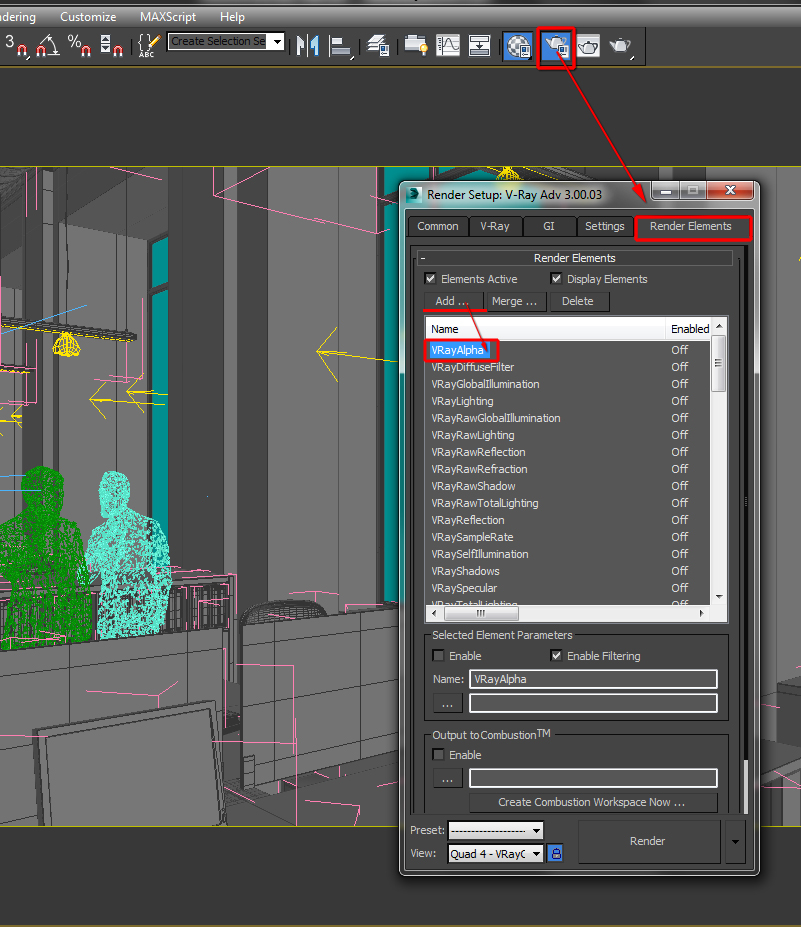
Add render elements
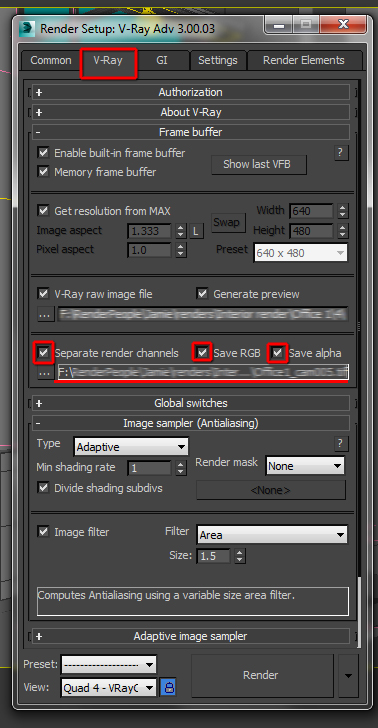
Enable the separate render channels option
Choosing the correct background image
Depending on the camera angle, finding the correct high resolution background image can be time consuming and challenging at times. Especially when working on tight deadlines.
Gobotree has been utterly influential in helping me find the correct background image for any project I’ve been part of.
It’s also worth mentioning that, this website has a huge photo library of cut outs, trees, grass, shrubs, people, etc.
To access the Gobotree website, simply Google, gobotree, or go to, http://www.gobotree.com/
To pick a specific image/photo , simply start by clicking on the, Categories button, and choosing from its dropdown list .
For instance, to select the, London category, one would have been required to choose and click three times: Categories, cities, London
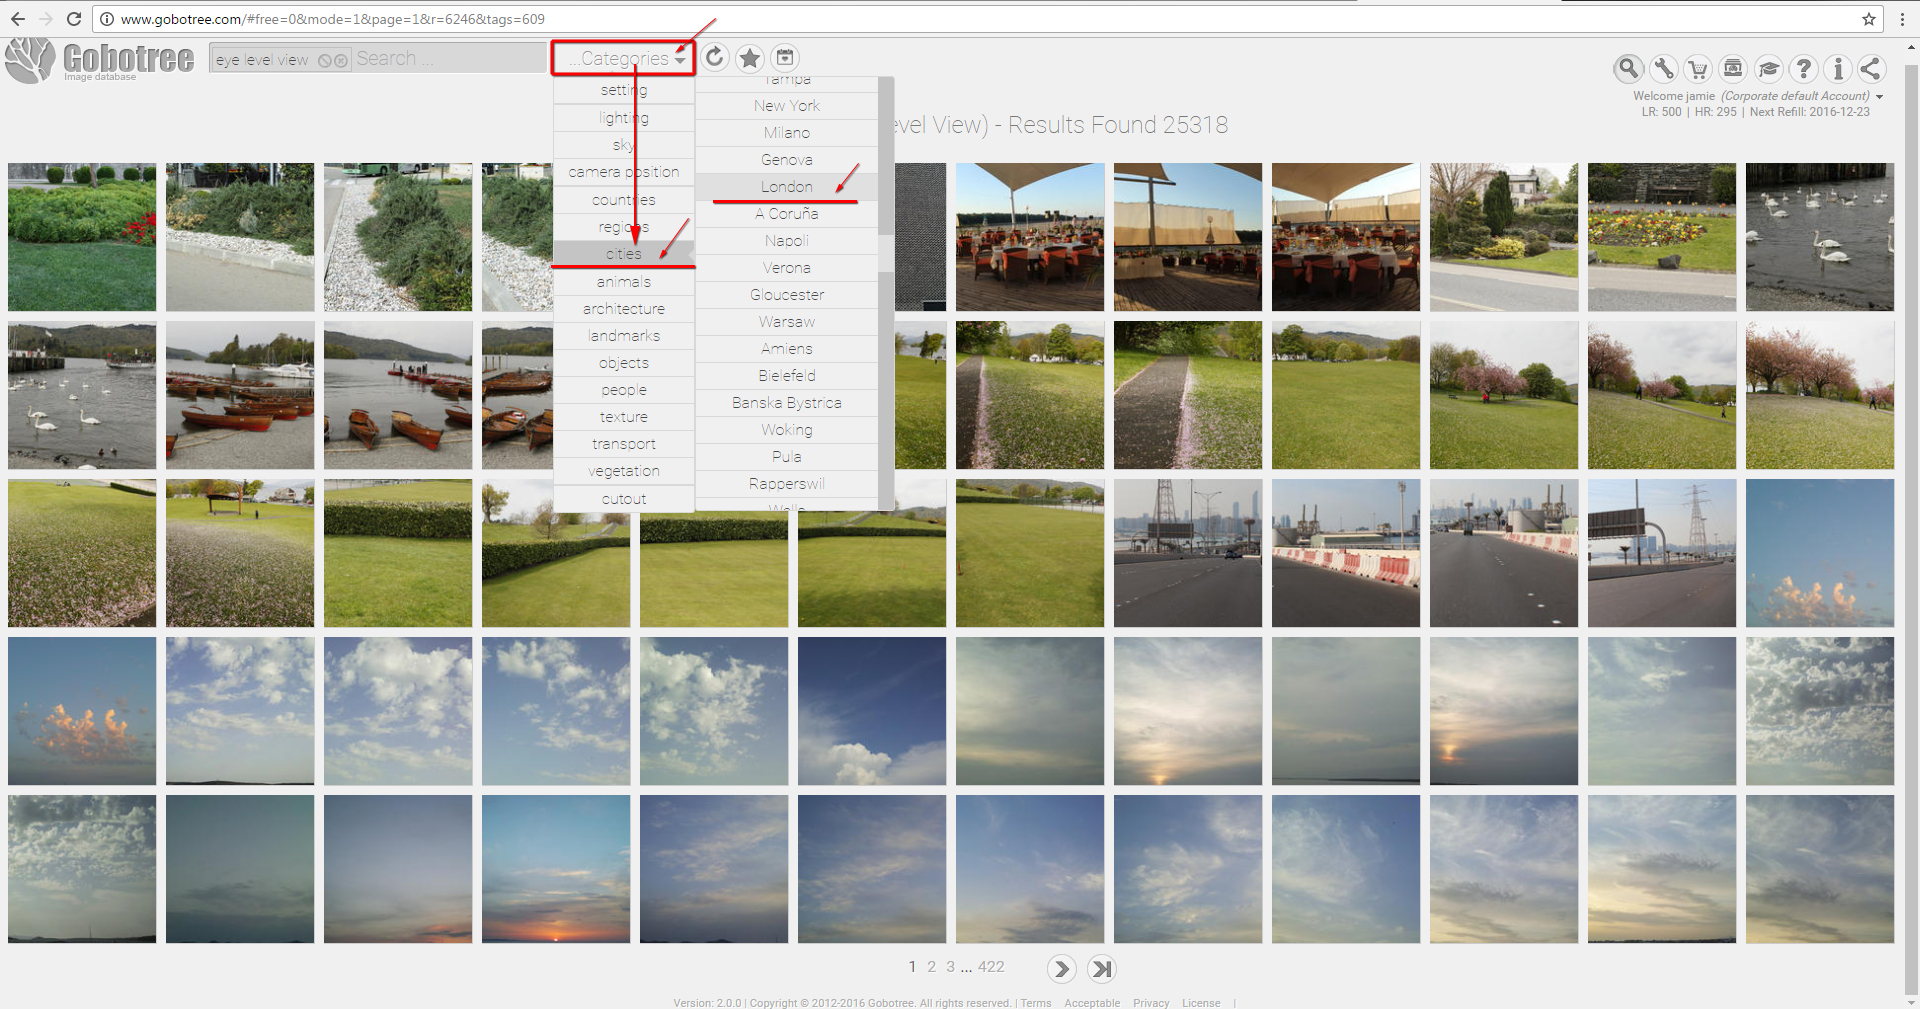
Choosing London category
To narrow down searches even further, users can continue adding categories along the search box.
Also, each search category can be deleted individually from the Categories search box
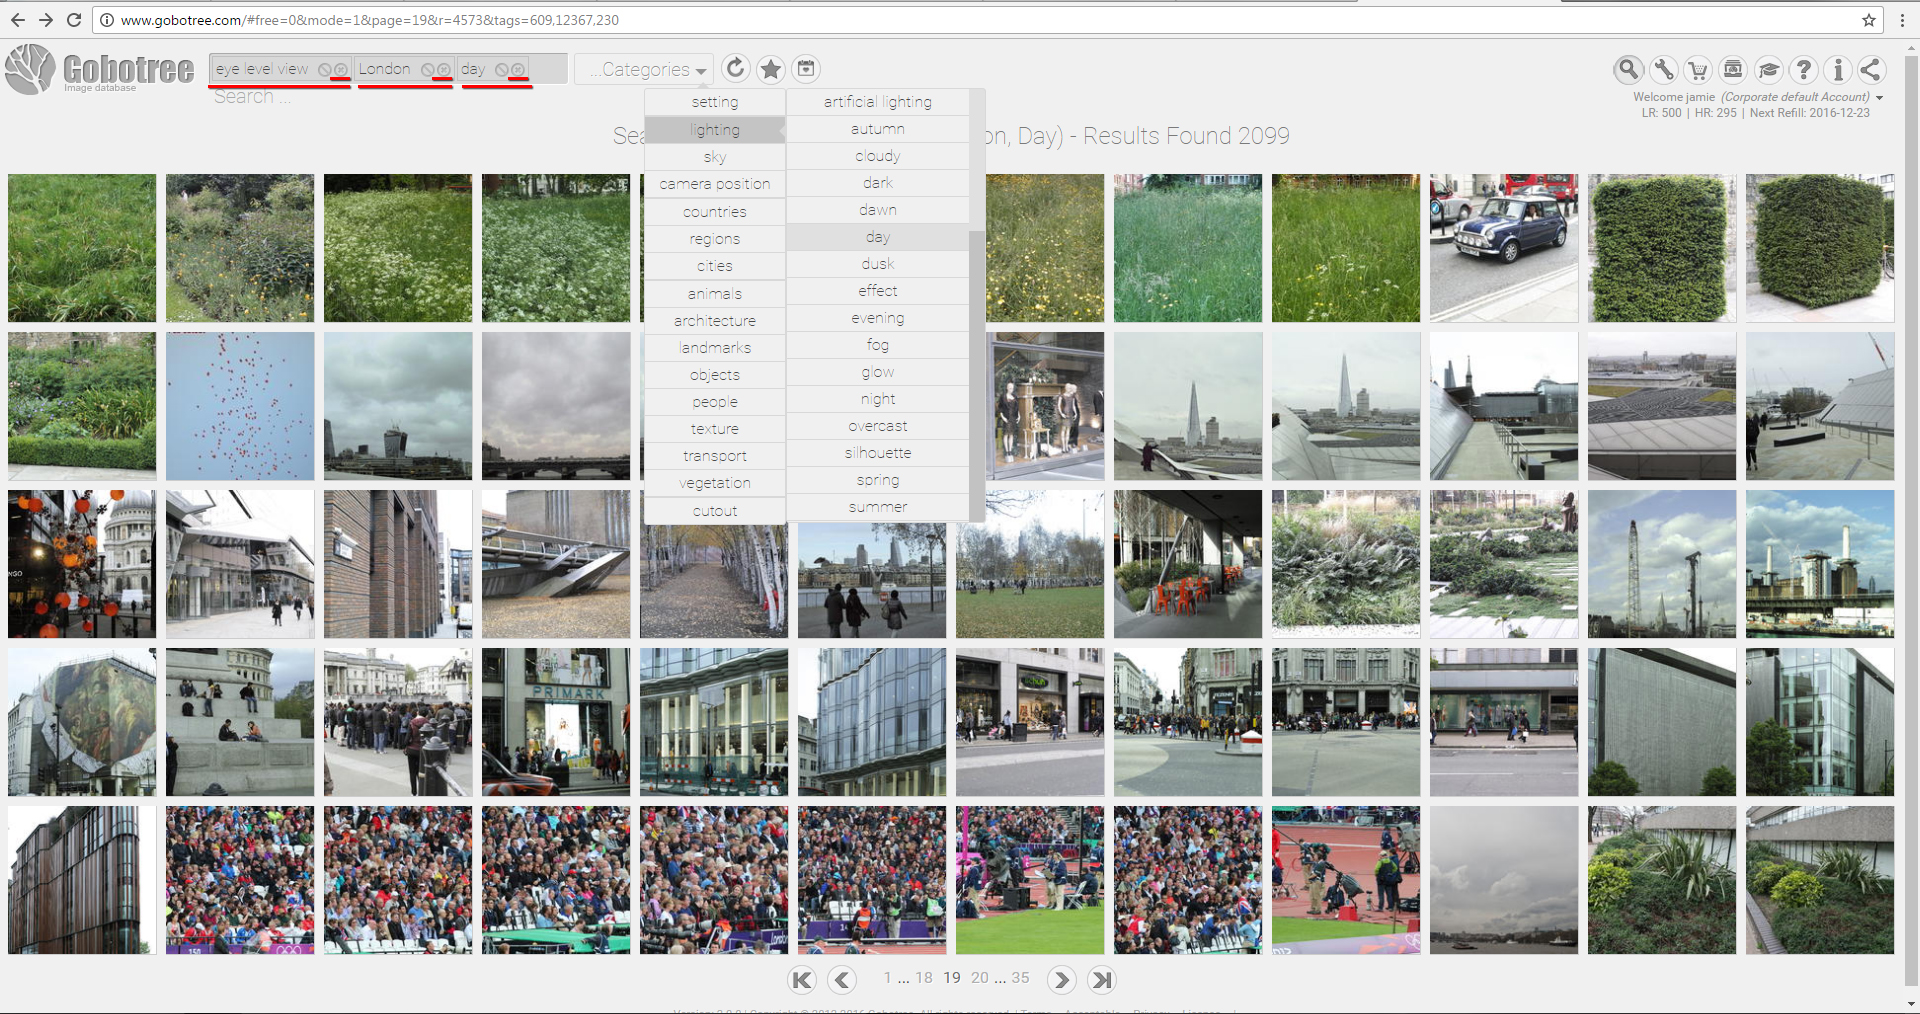
Adding more search Categories
Depending on the type of account a user holds, one can download low res or high resolution images/photos.
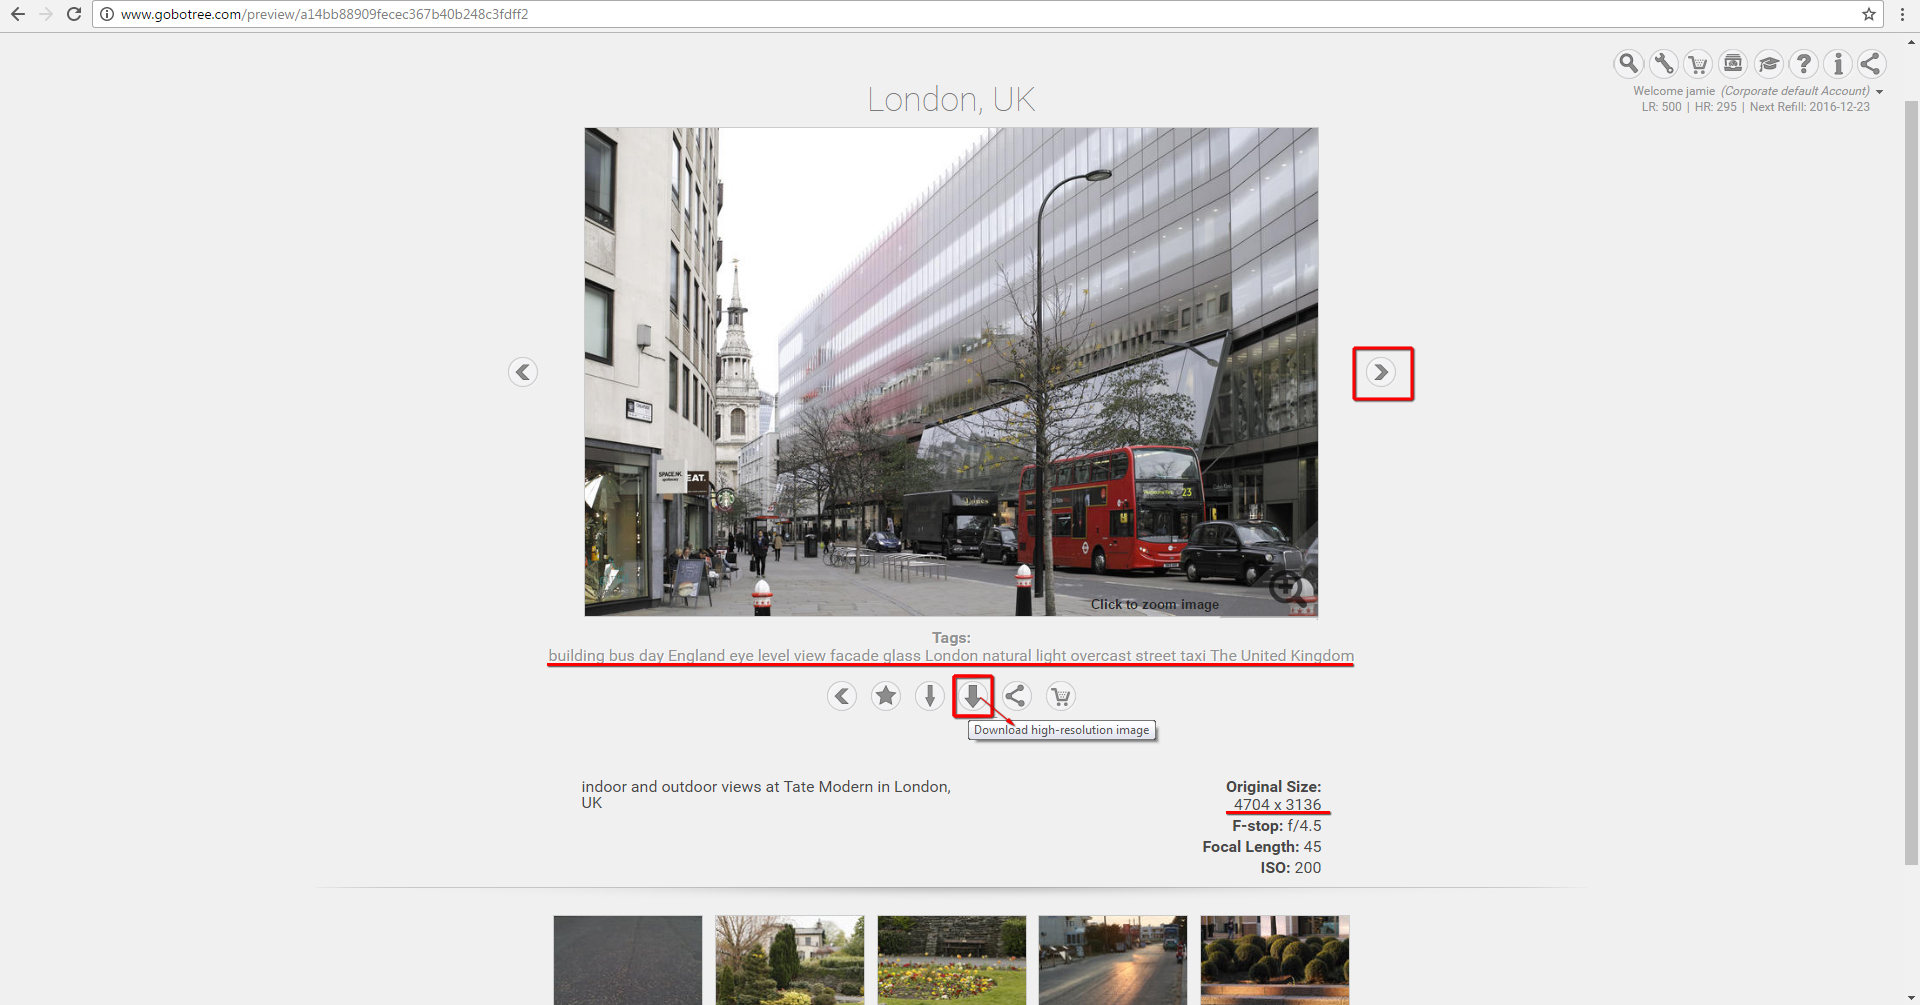
Download the high resolution image/photo
All images/photos require unzipping, as they download as a zip/winrar file format.
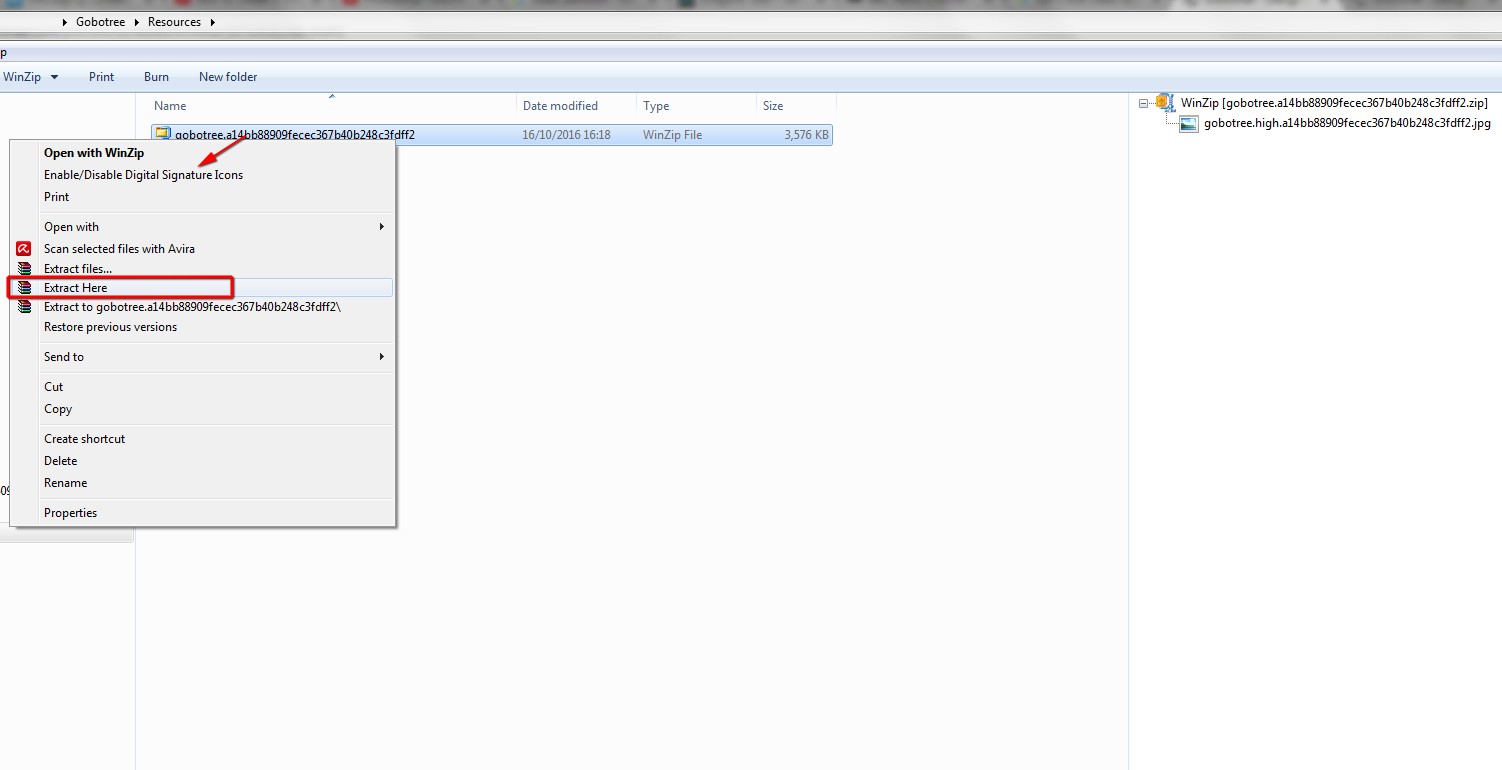
Unzipping gobotree image/photo
In Photoshop, open the downloaded gobotree photo/ image background.
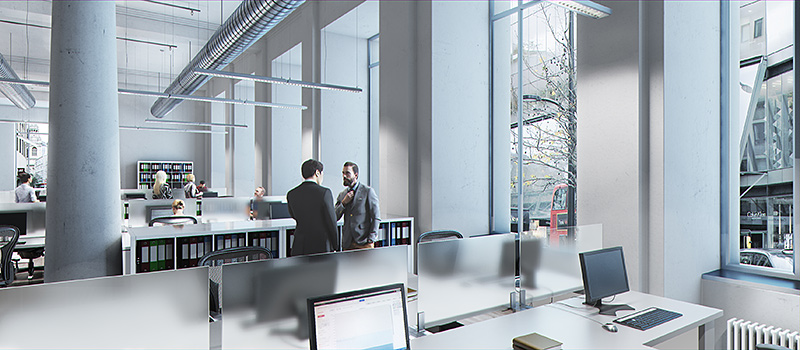
The current render and Photoshop composition looks OK. However, adding a background image/photo will make the white areas of the environment more interesting and realistic.
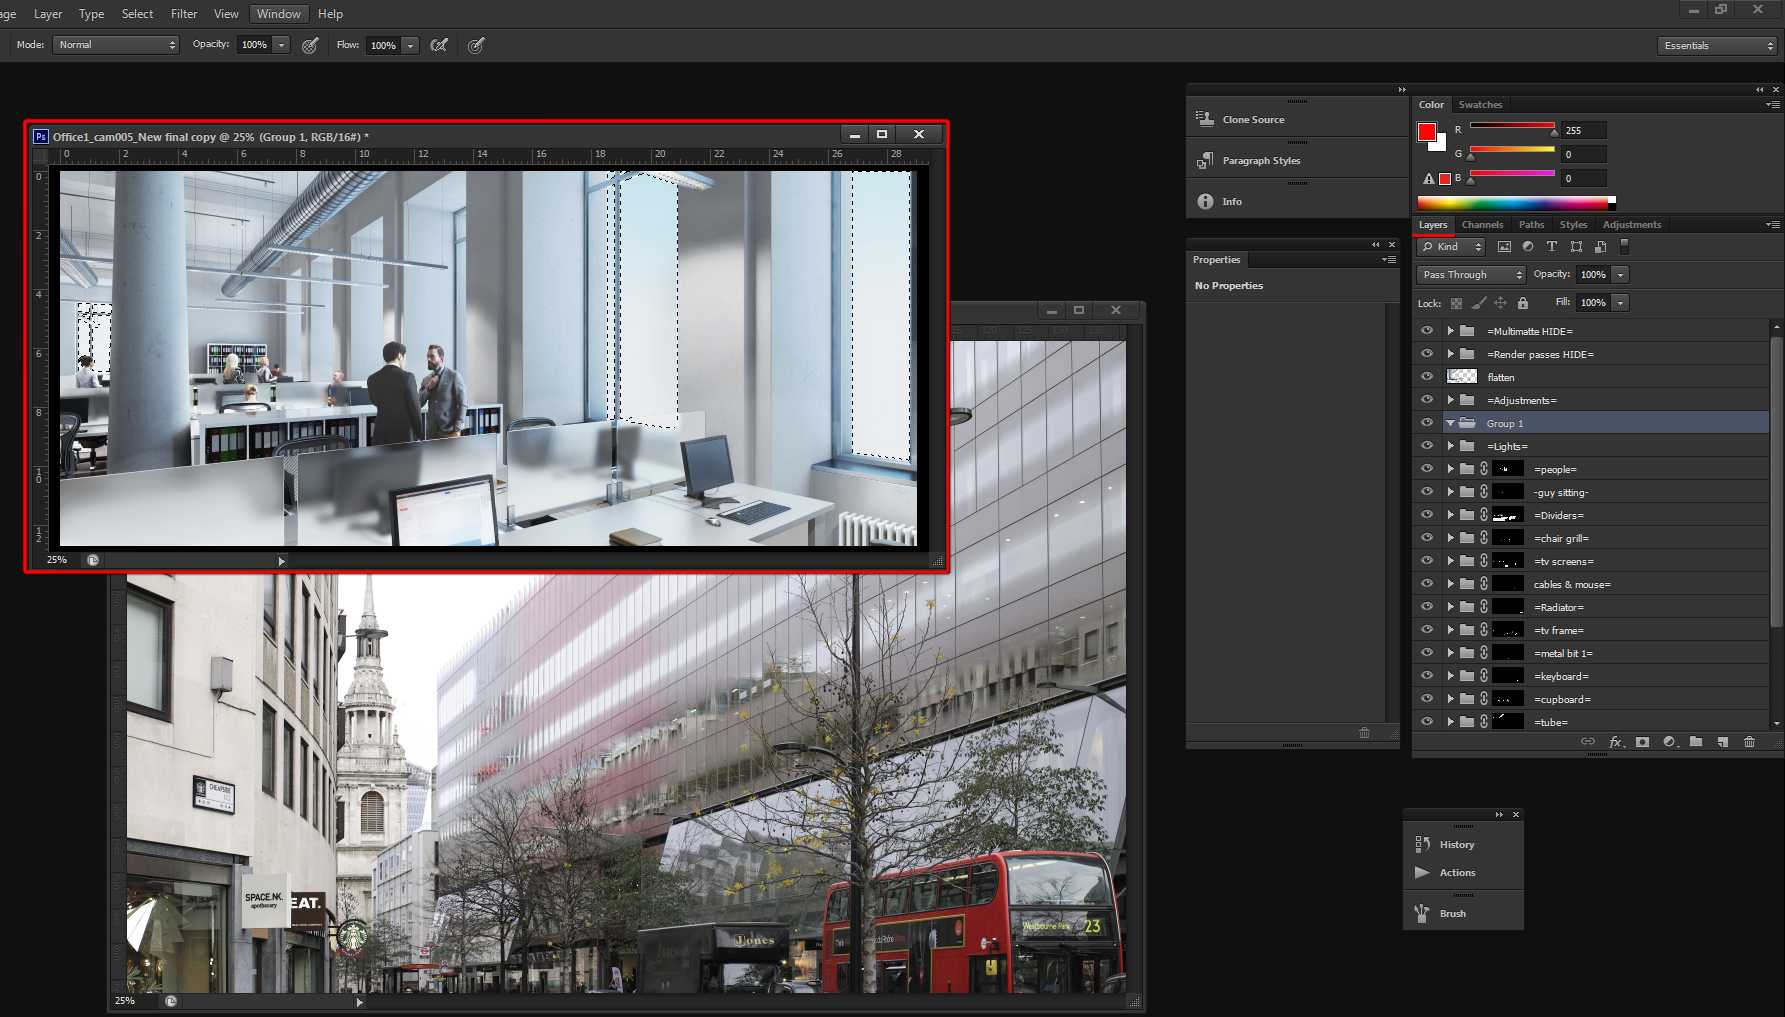
To do so, start by blocking out the environment areas, with a group folder and an adjacent layer mask.
To create a group folder, simply click on the Create a new group button.
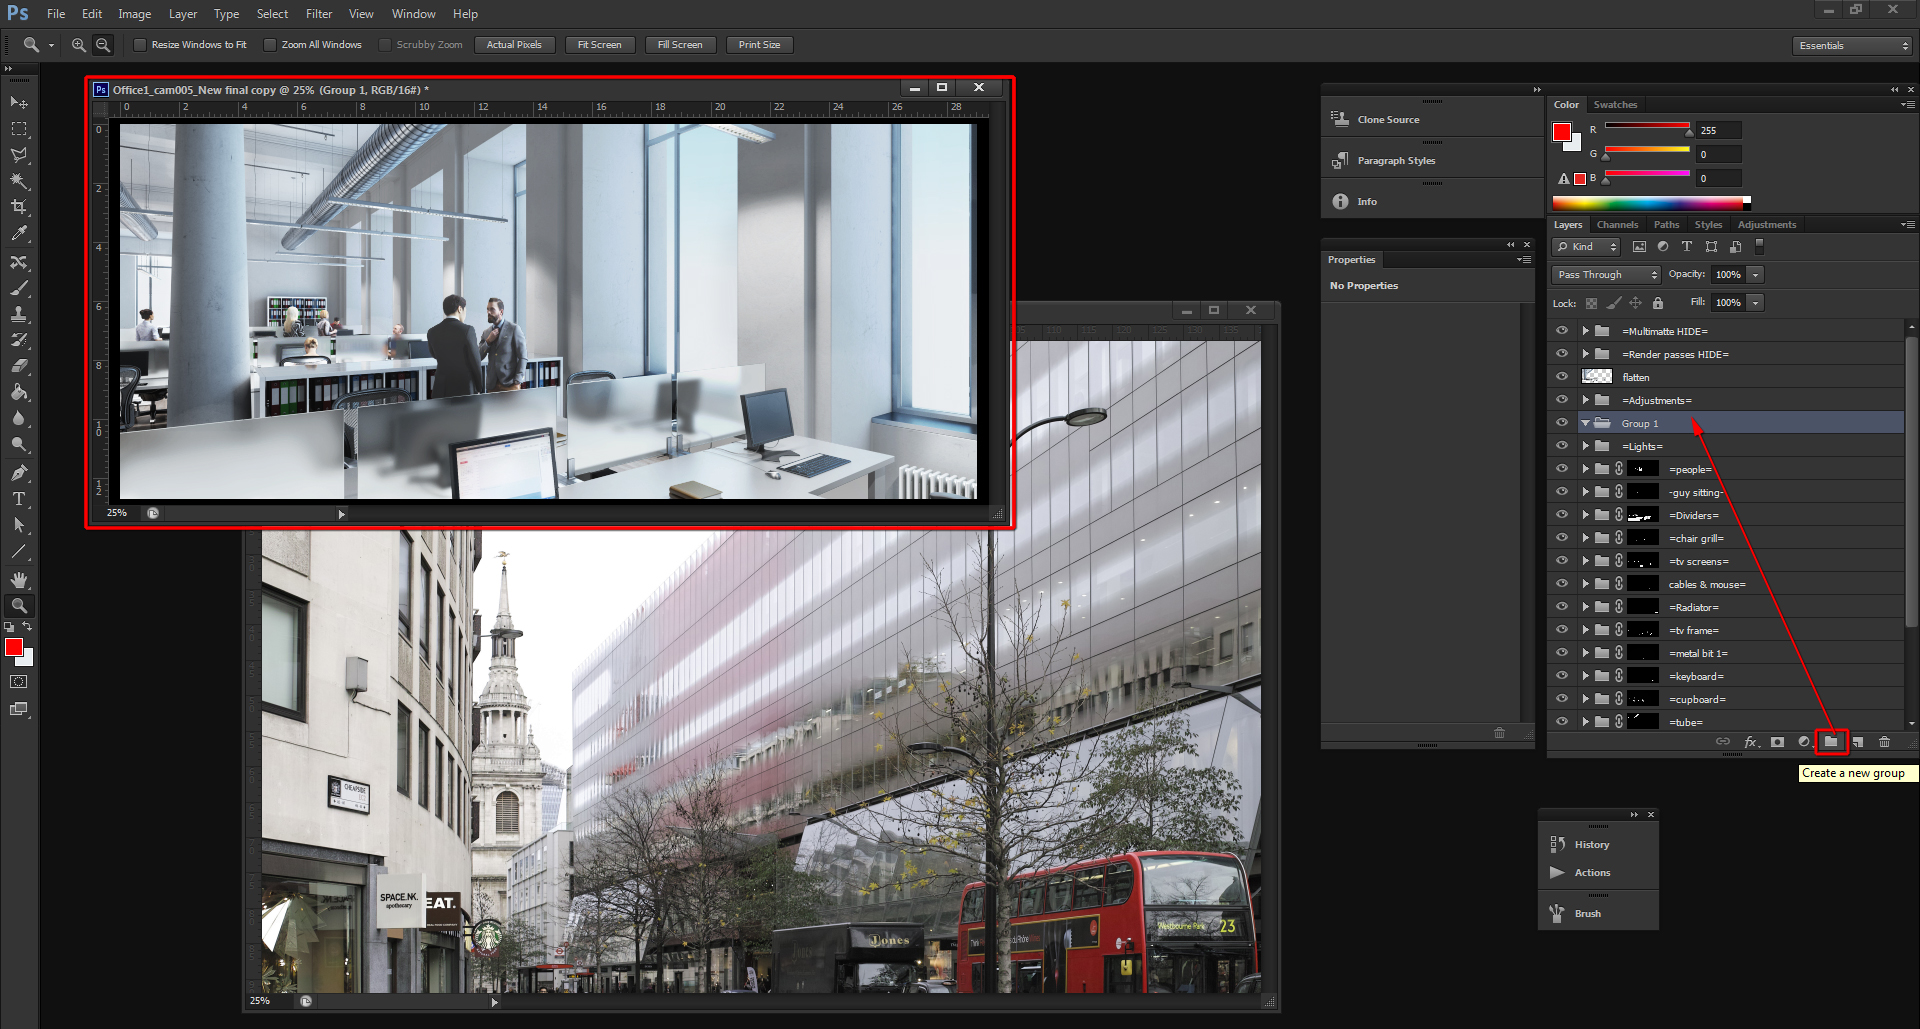
Create a new group folder
Next, go to the Channels palette, hold down the Ctrl key, and click on the Alpha channel to enable its selection.
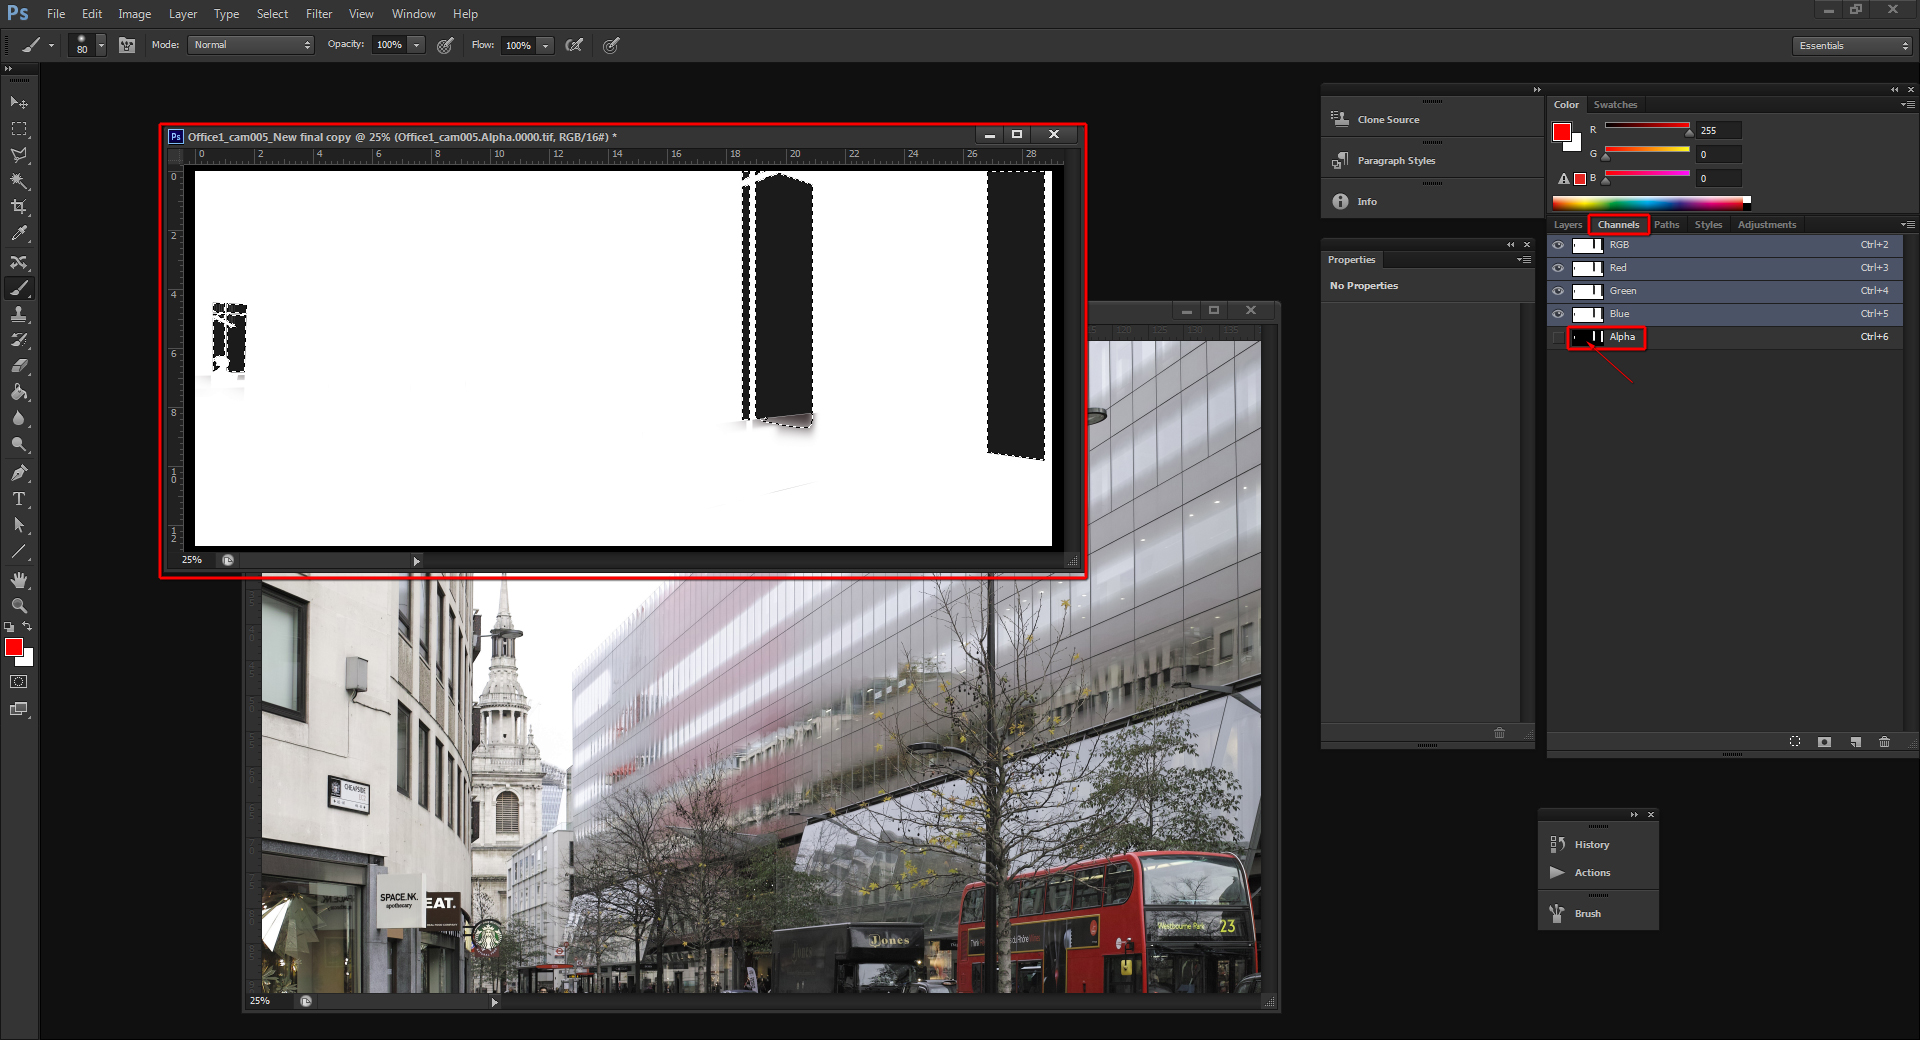
Click on the Alpha channel mask
Alpha channel selection enabled
Following that, click on the, Add layer mask button, to create it. A layer mask should appear.
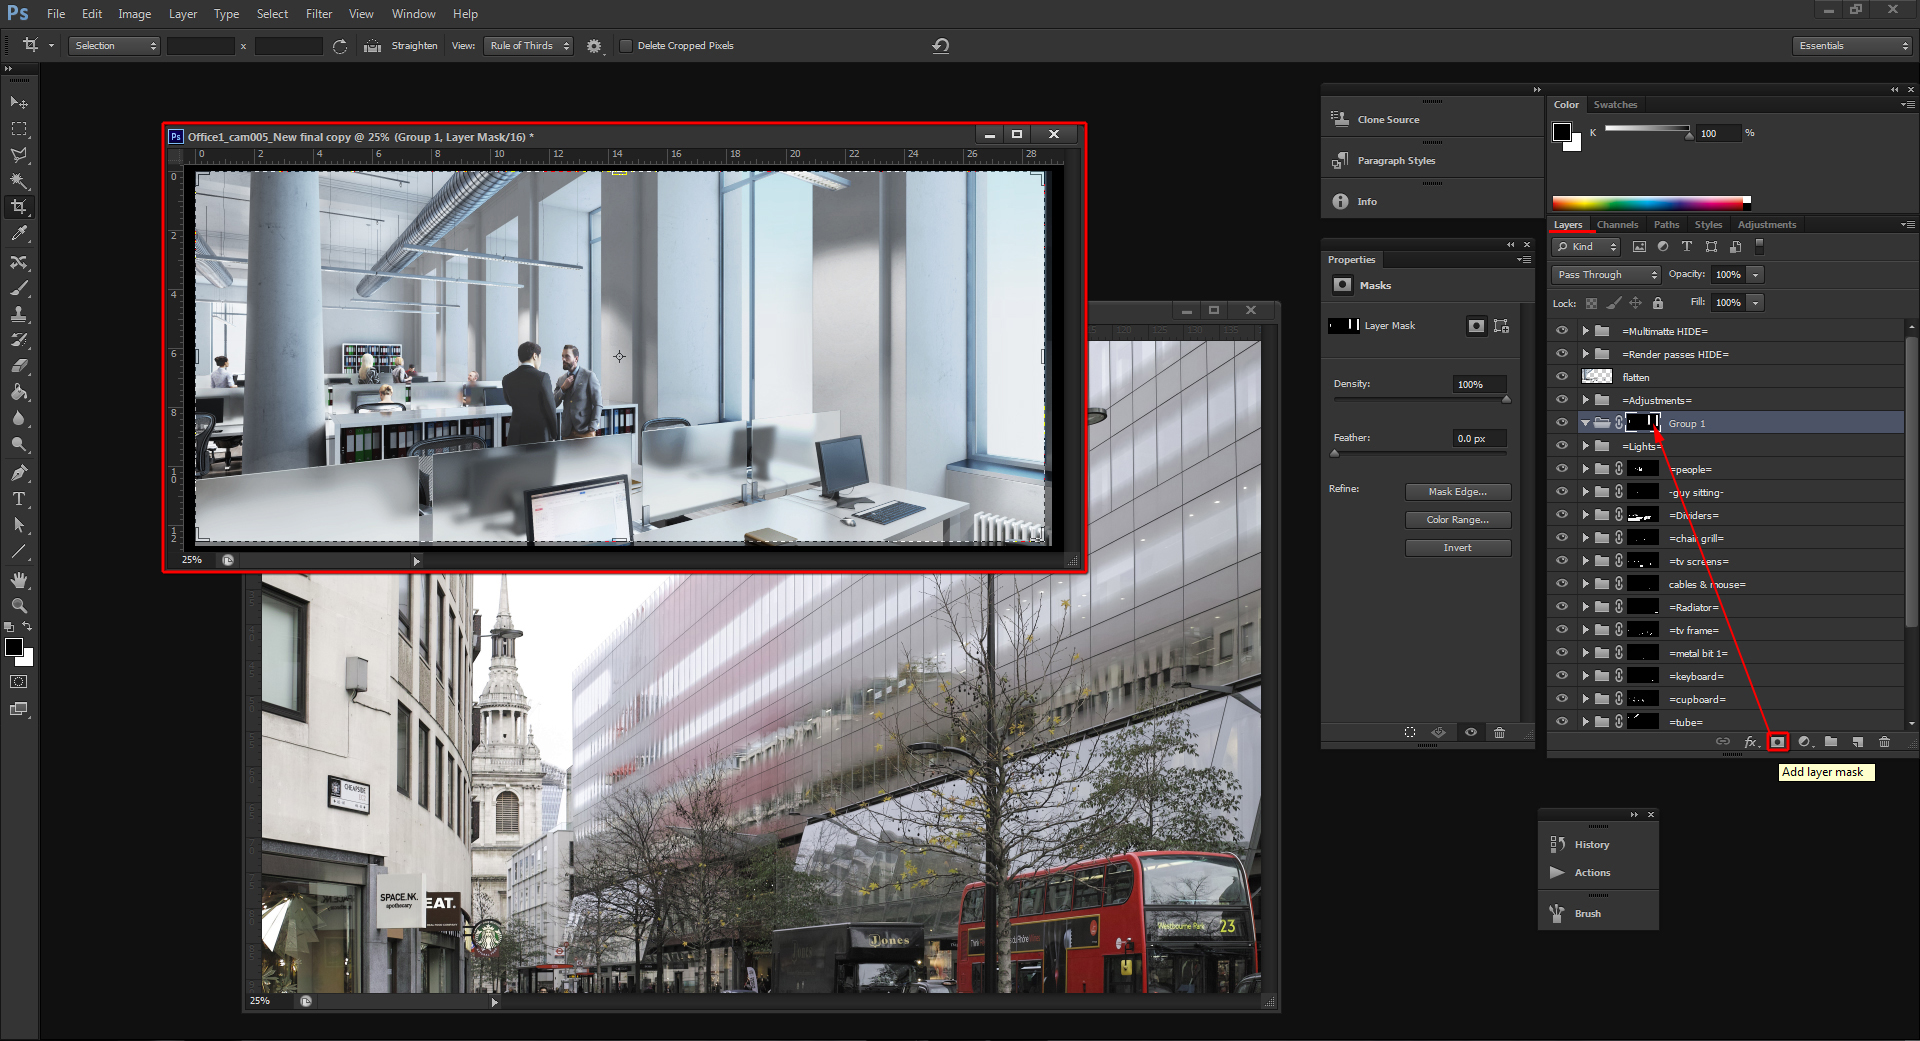
Create a Layer mask
This group folder and its layer mask will allow users to move, rotate and edit/adjust layers within the group folder mask.
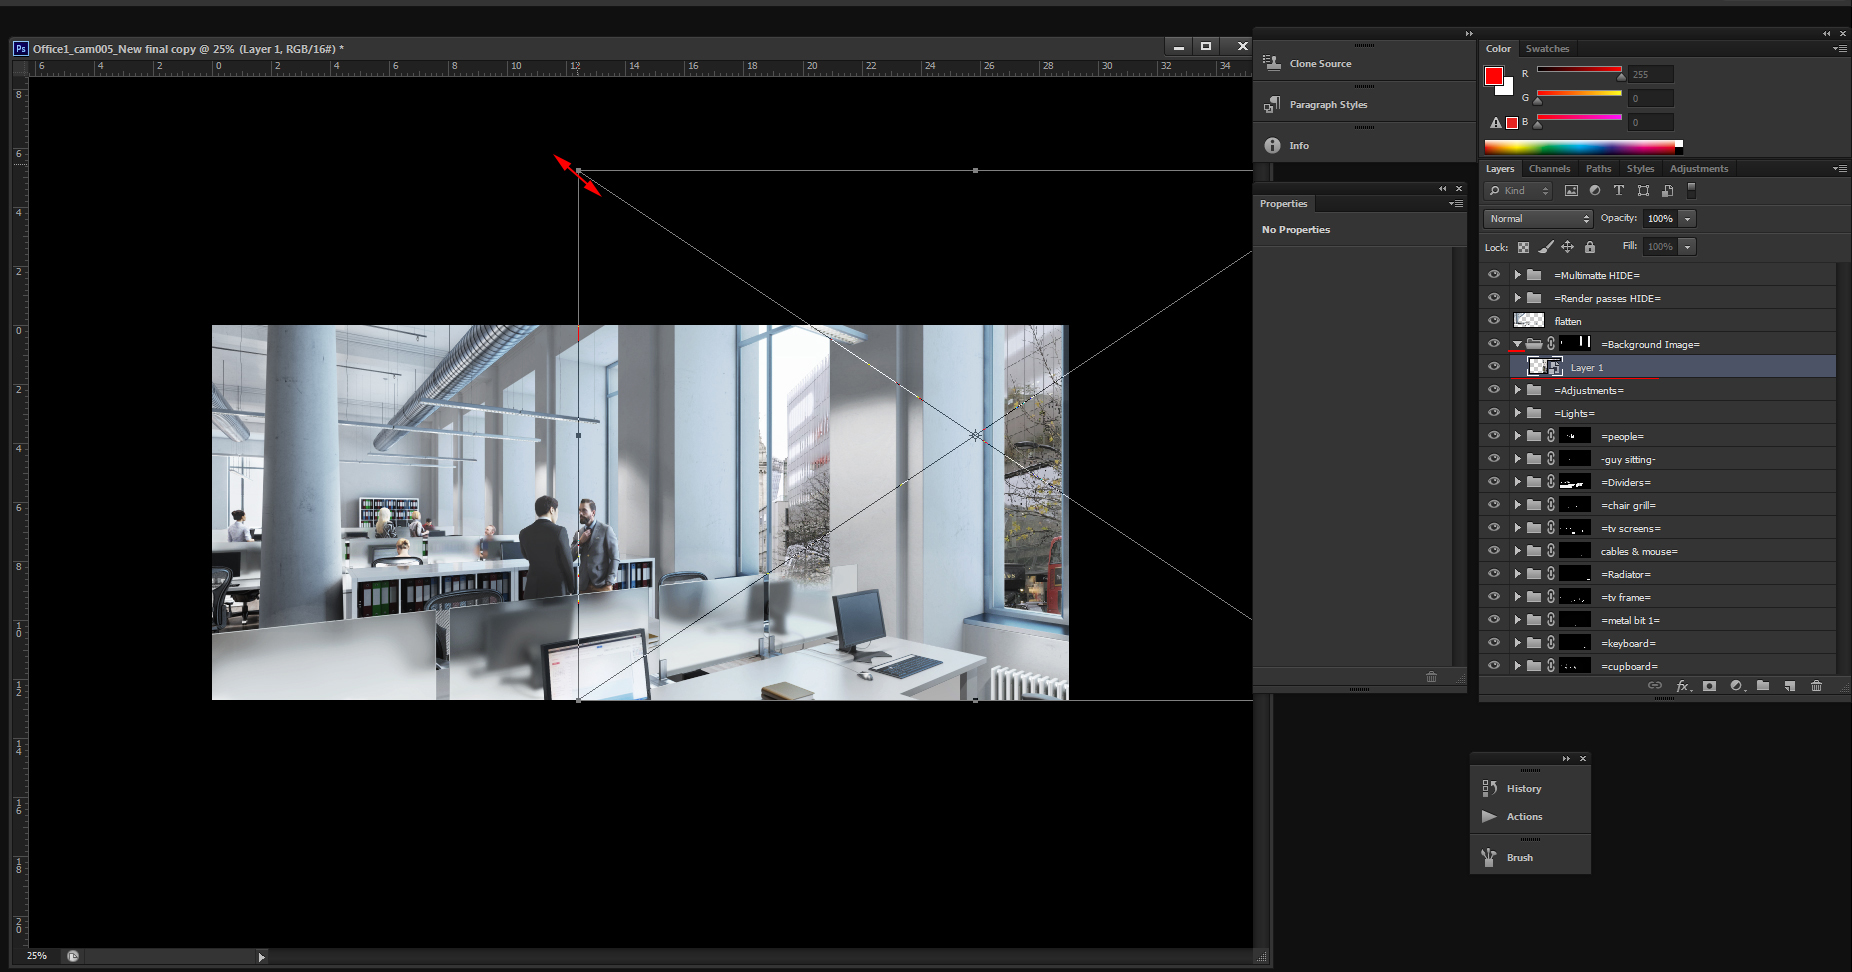
Start by renaming this group folder as, =Background Image=, and moving the background image into it, with the move tool (V).
Notice how the background image/photo is accurately confined within the boundaries of the group folder’s mask .
Rename and drop the background image/photo into the, =Background Image= group folder
Transparency/translucency channel through the glass
The subsequent step is to move, scale and edit the background image to fit the environment more realistically.
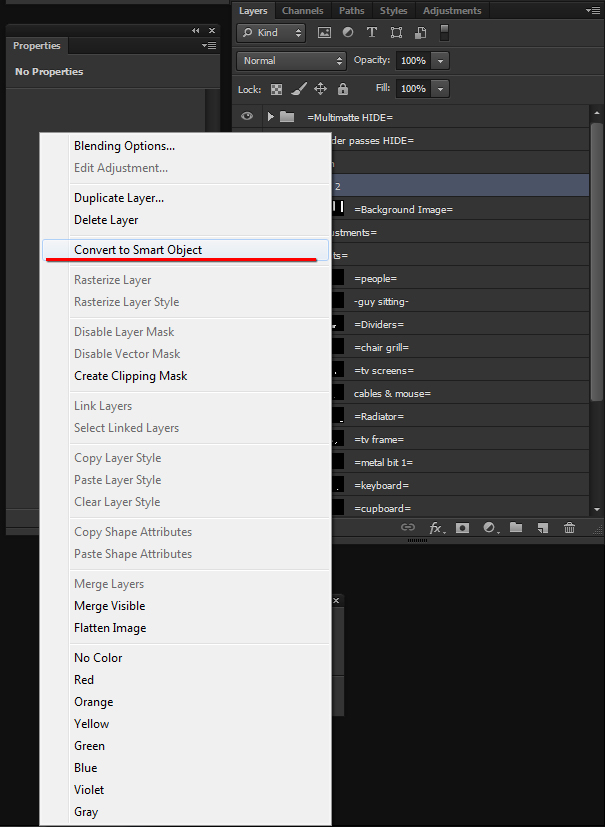
Begin by converting the background image/photo into a smart object first. To do so, simply right click and choose the, Convert to smart Object option.
Smart object layers are widely used to help retain the quality of the original high resolution layer when scaled down; and to record some of the actions/filters applied to a layer.
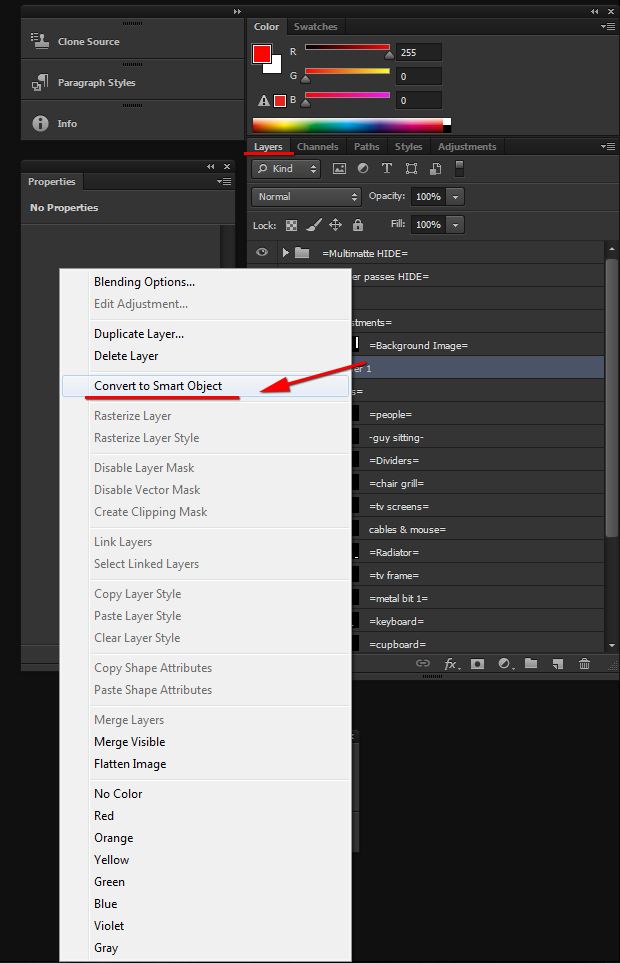
Convert to Smart object
Next, move the, =Background Image= group folder on top of the, =Adjustments= group folder, by simply, left clicking +holding down + moving the group folder upwards.
The =Background Image= group folder should look brighter as result of moving it up from underneath the, =Adjustments= group folder.
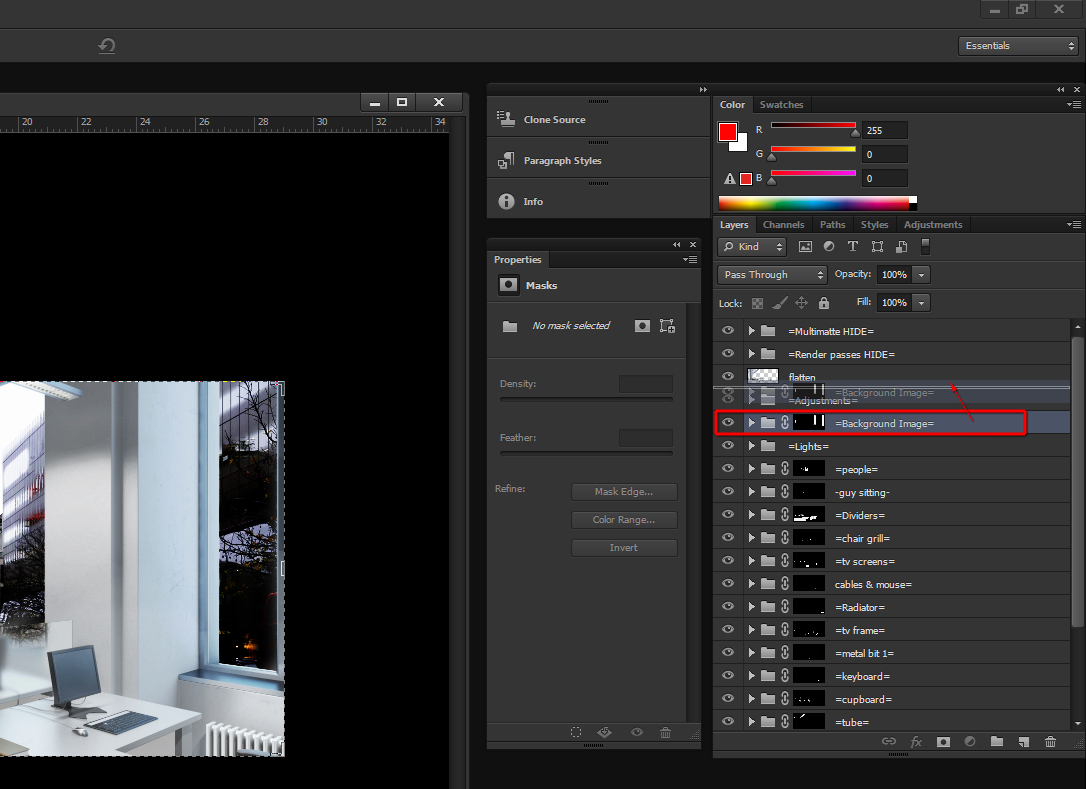
Move up the =Background Image= group folder
=Background Image= group folder above the, =Adjustments= group folder
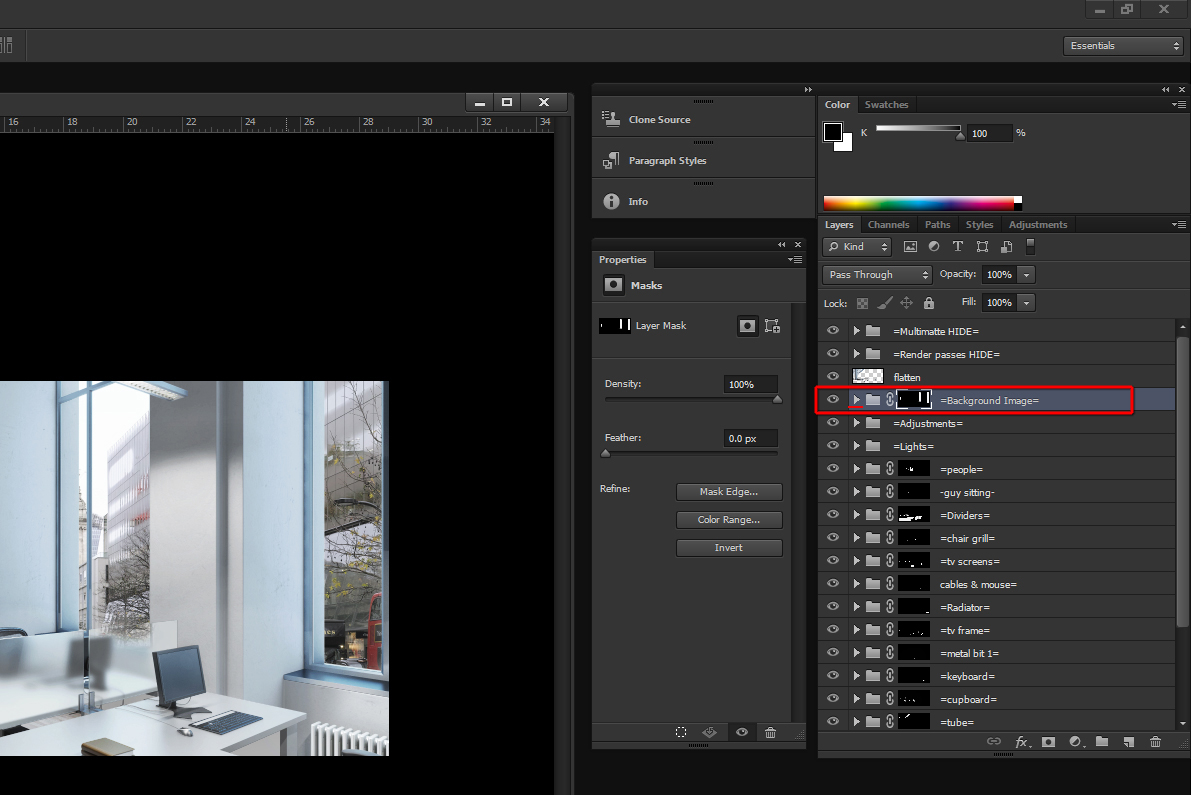
Following that, one can scale down the background image/photo by simply pressing, Ctrl+t.
To scale proportionally, one can hold own the Shift key while the transform tool is enabled, followed by moving its corner handles.
Use the Transform tool to scale down background image/photo proportionally
To distort the background image/photo in order to match the vanishing lines, simply right click on transform tool while enabled, followed by choosing to Distort.
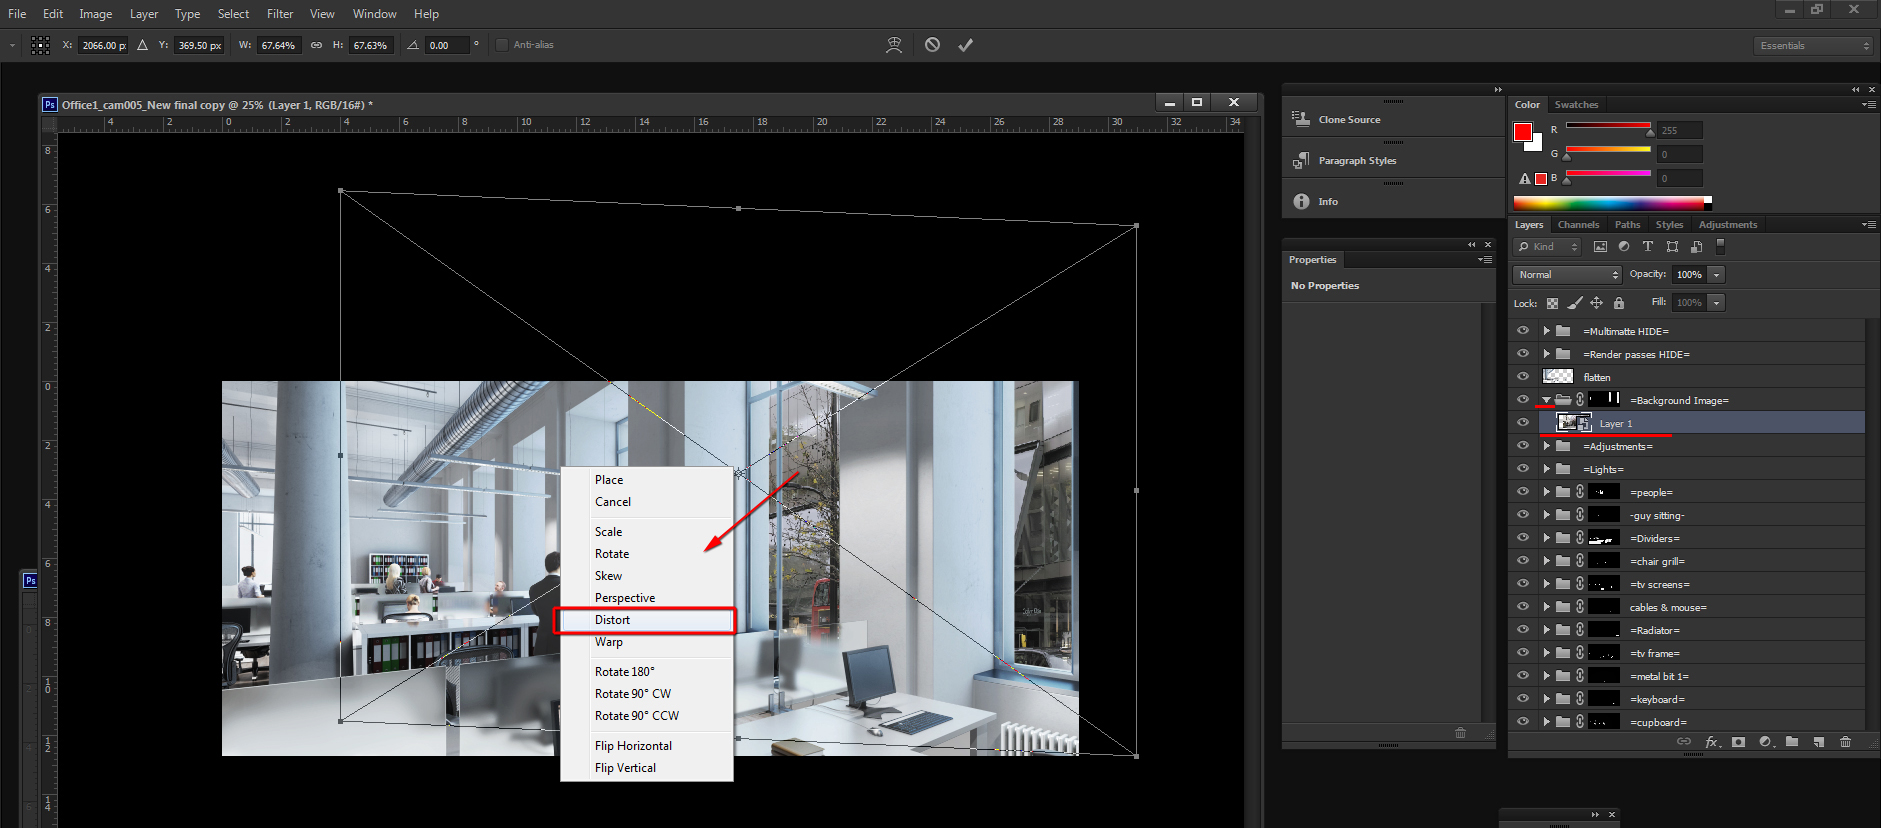
Transform Distort the background image/photo
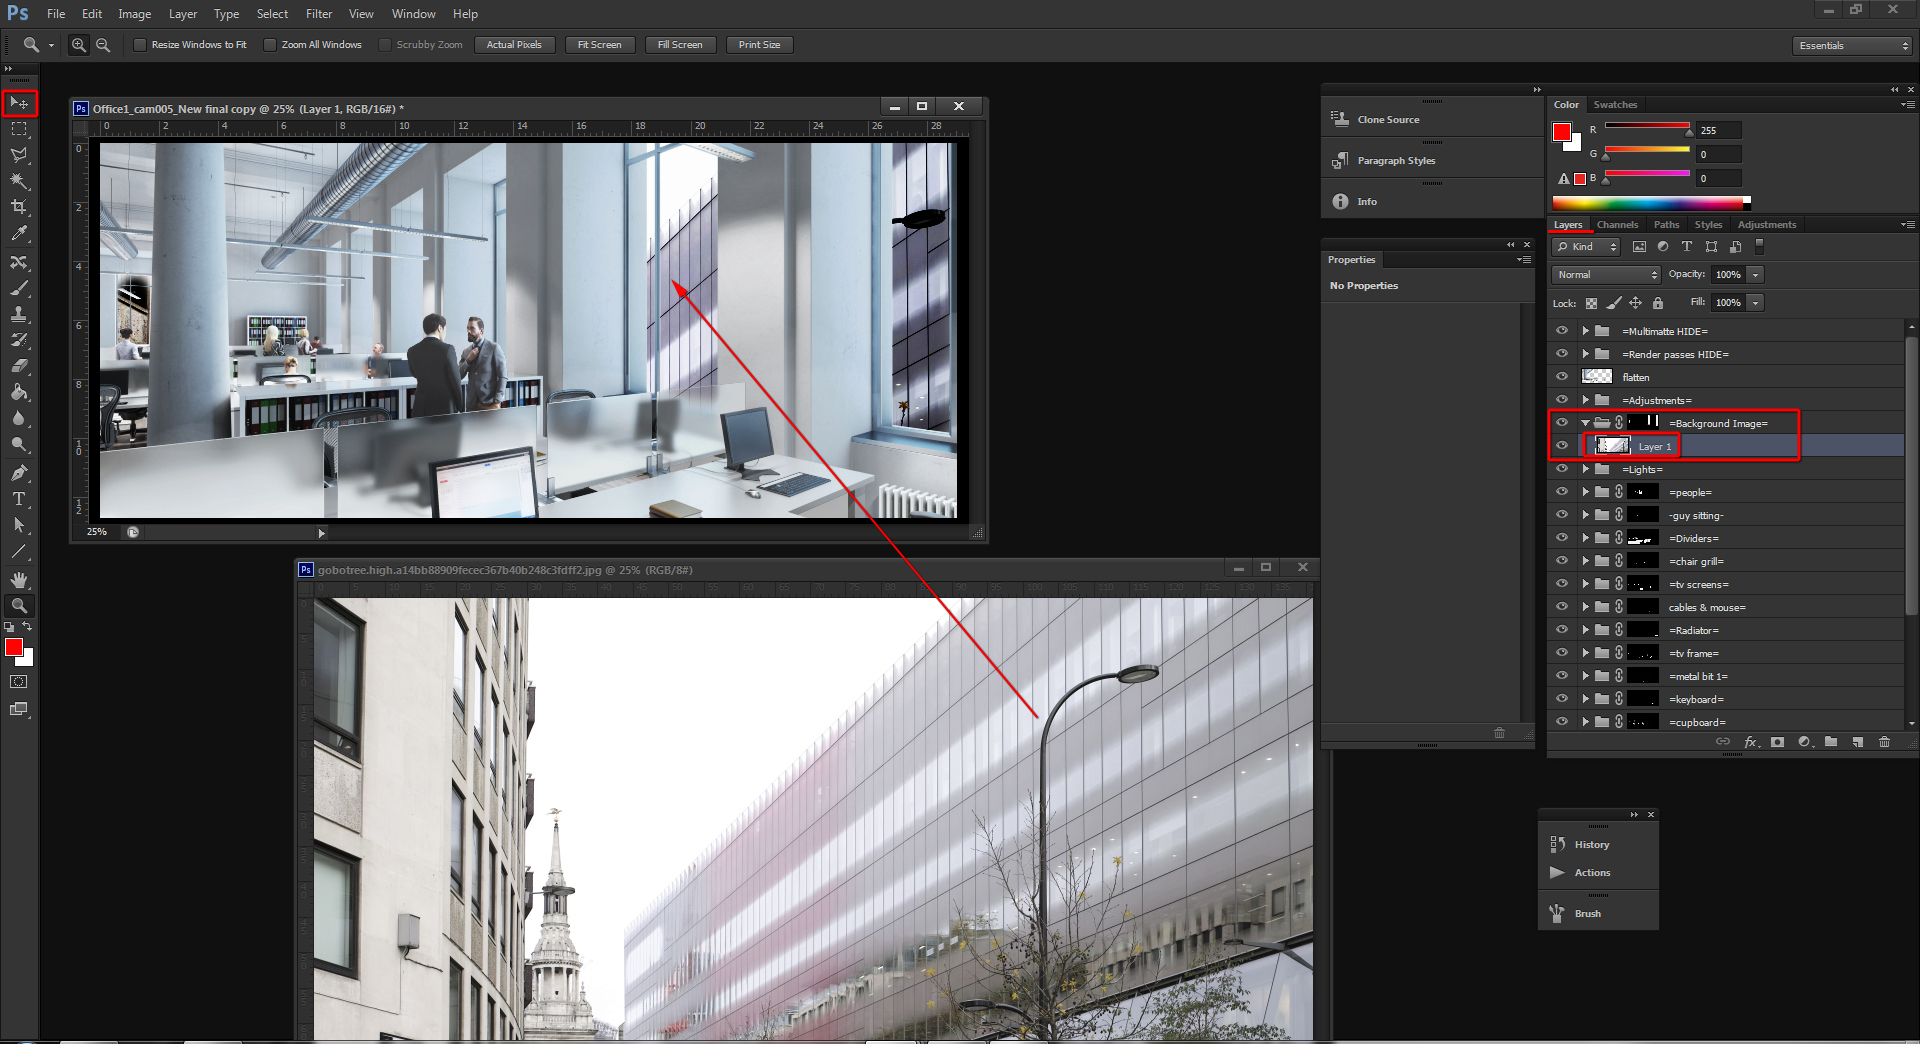
The next step is to fill the left window (currently white) with a background image.
To do so, first duplicate the current background image/photo being used on right windows, by right clicking and choosing to, Duplicate Layer .
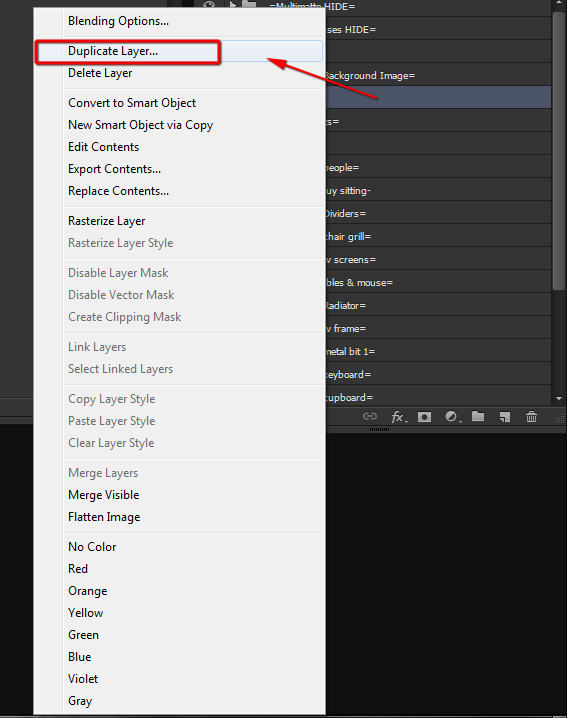
Duplicate Layer
The subsequent step is to use some of the previous steps to move and transform the image/photo to fit the left window.

Move and transform the image/photo to fit the left window.
Colour correct and adjust the Levels of the background image photo
The overall render and composition is looking increasingly more realistic and interesting with the background image/photo.
The final step is to colour correct and adjust the Levels of the background image/ photo.
Start by adding the, Levels adjustment layer
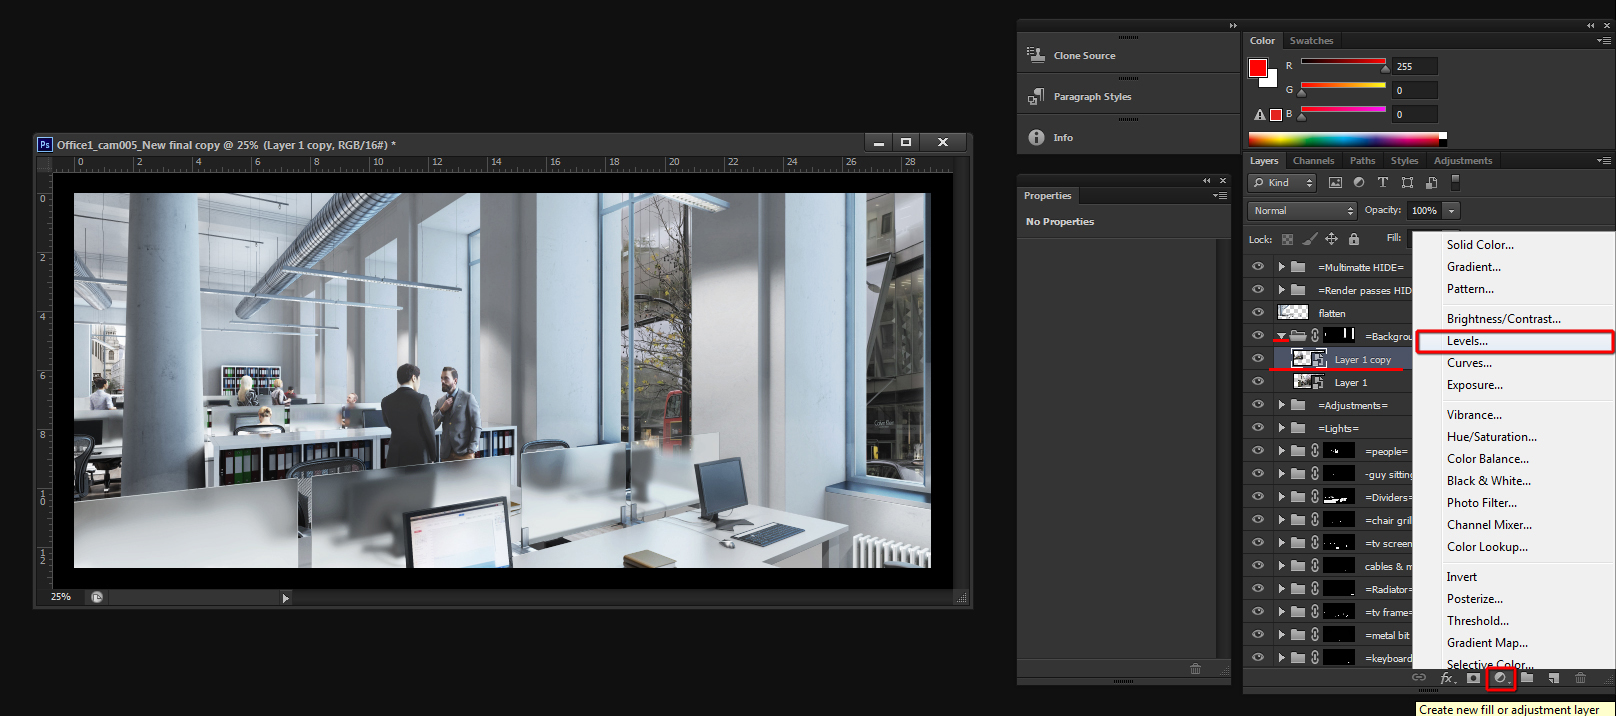
Add the Levels adjustment layer
Increase the levels slightly by moving the right and mid points to left (e.g. 0.0; 2.21; 192)
Notice how the background image/photo is almost integrated with the overall render.

Increase the Levels
To colour correct and match the blue tones seen on the window areas, simply add a Photo Filter adjustment layer.
Choose the Cooling Filter (82) from the Filter dropdown list, and increase its Density to about 37%.
Also, pick the Soft Light blending mode, under the Layer palette.
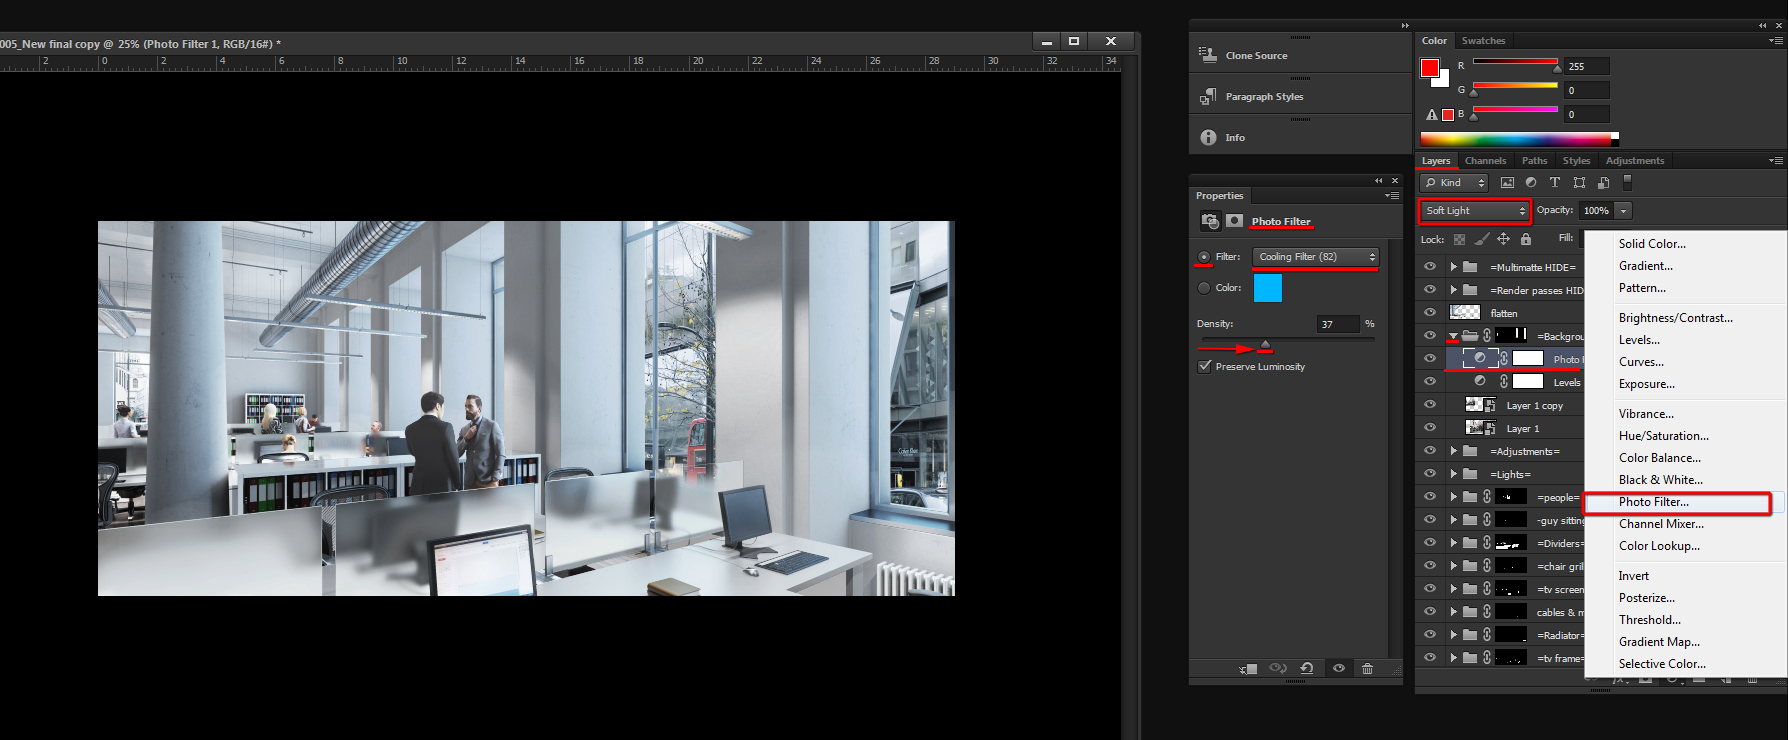
Add and tweak the Photo Filter adjustment layer
Adding a Glow effect on the windows
To create an atmospheric mood, It’s often common to add a bit of glow bursting through the glass windows.
To do so, simply start by creating a new layer above the, =Background Image= group layer. It is necessary for this layer to be on top, because its effect needs to spill beyond the glass windows.
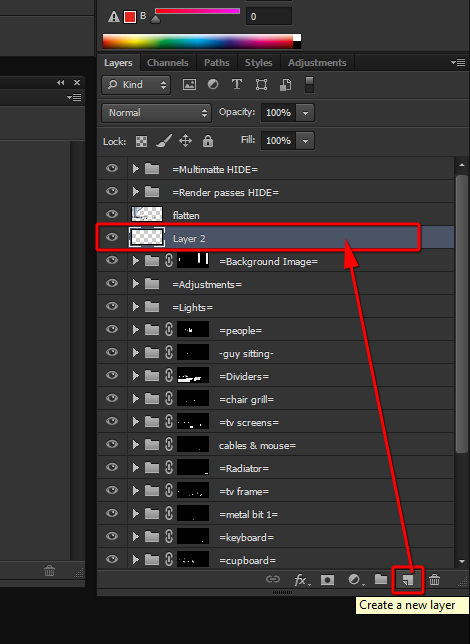
Create a new layer
While the newly created layer is still selected, hold down the Ctrl key and left click on the mask of the =Background Image= group layer.
This action should enable a selection around the windows.
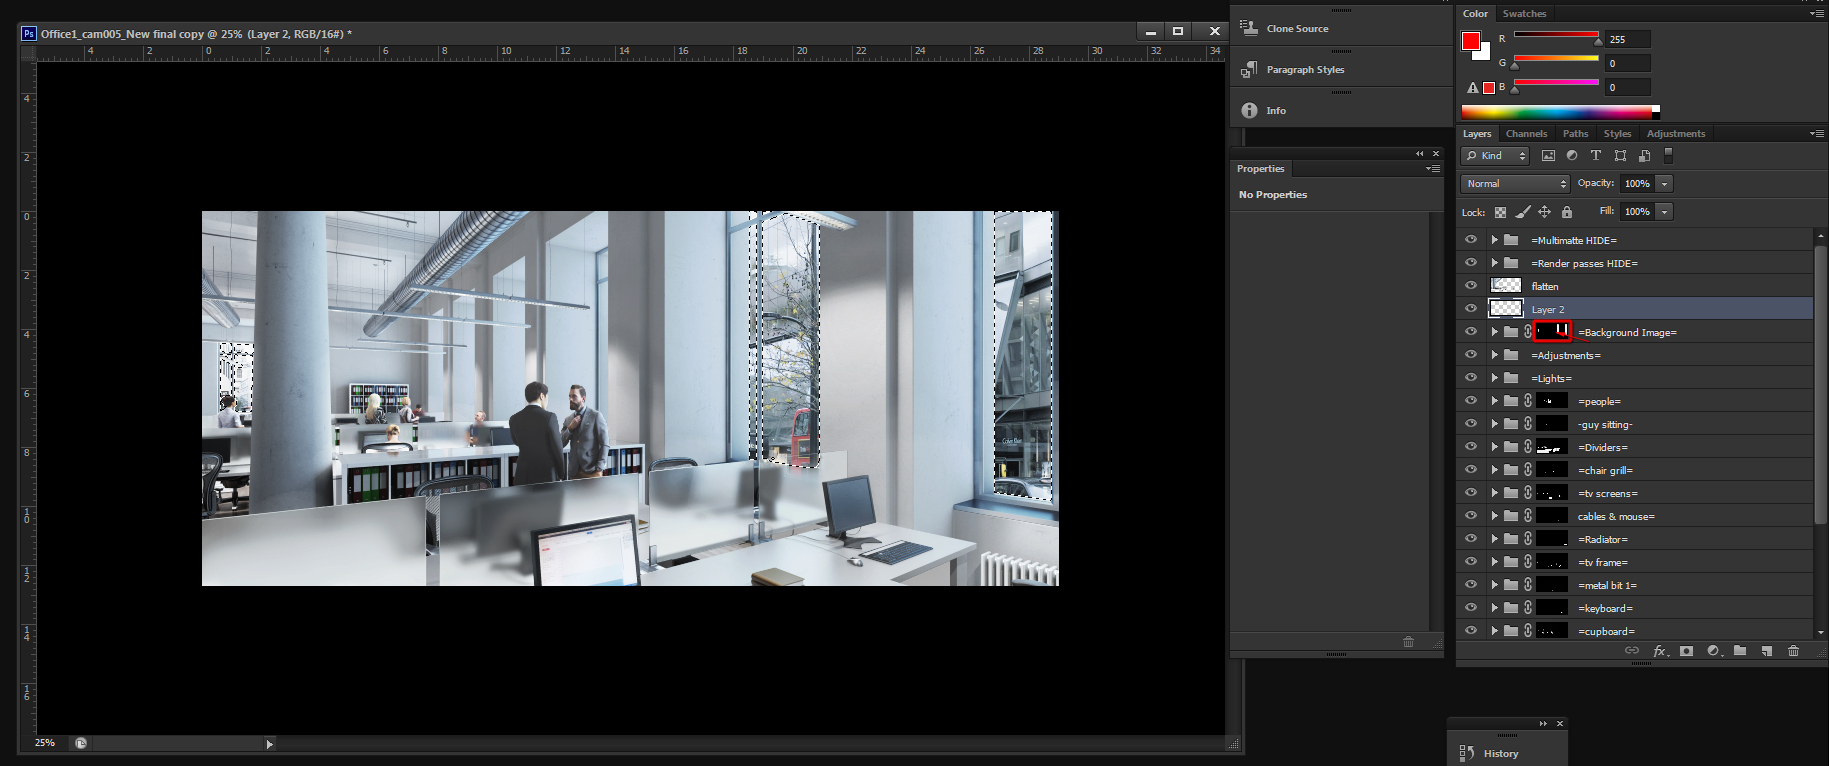
Glass window selections enabled
Next, enable the Paint Bucket tool (P) while the selection is still on, and the layer is selected. Followed by left clicking on the selection, to paint/fill the layer with a white paint.
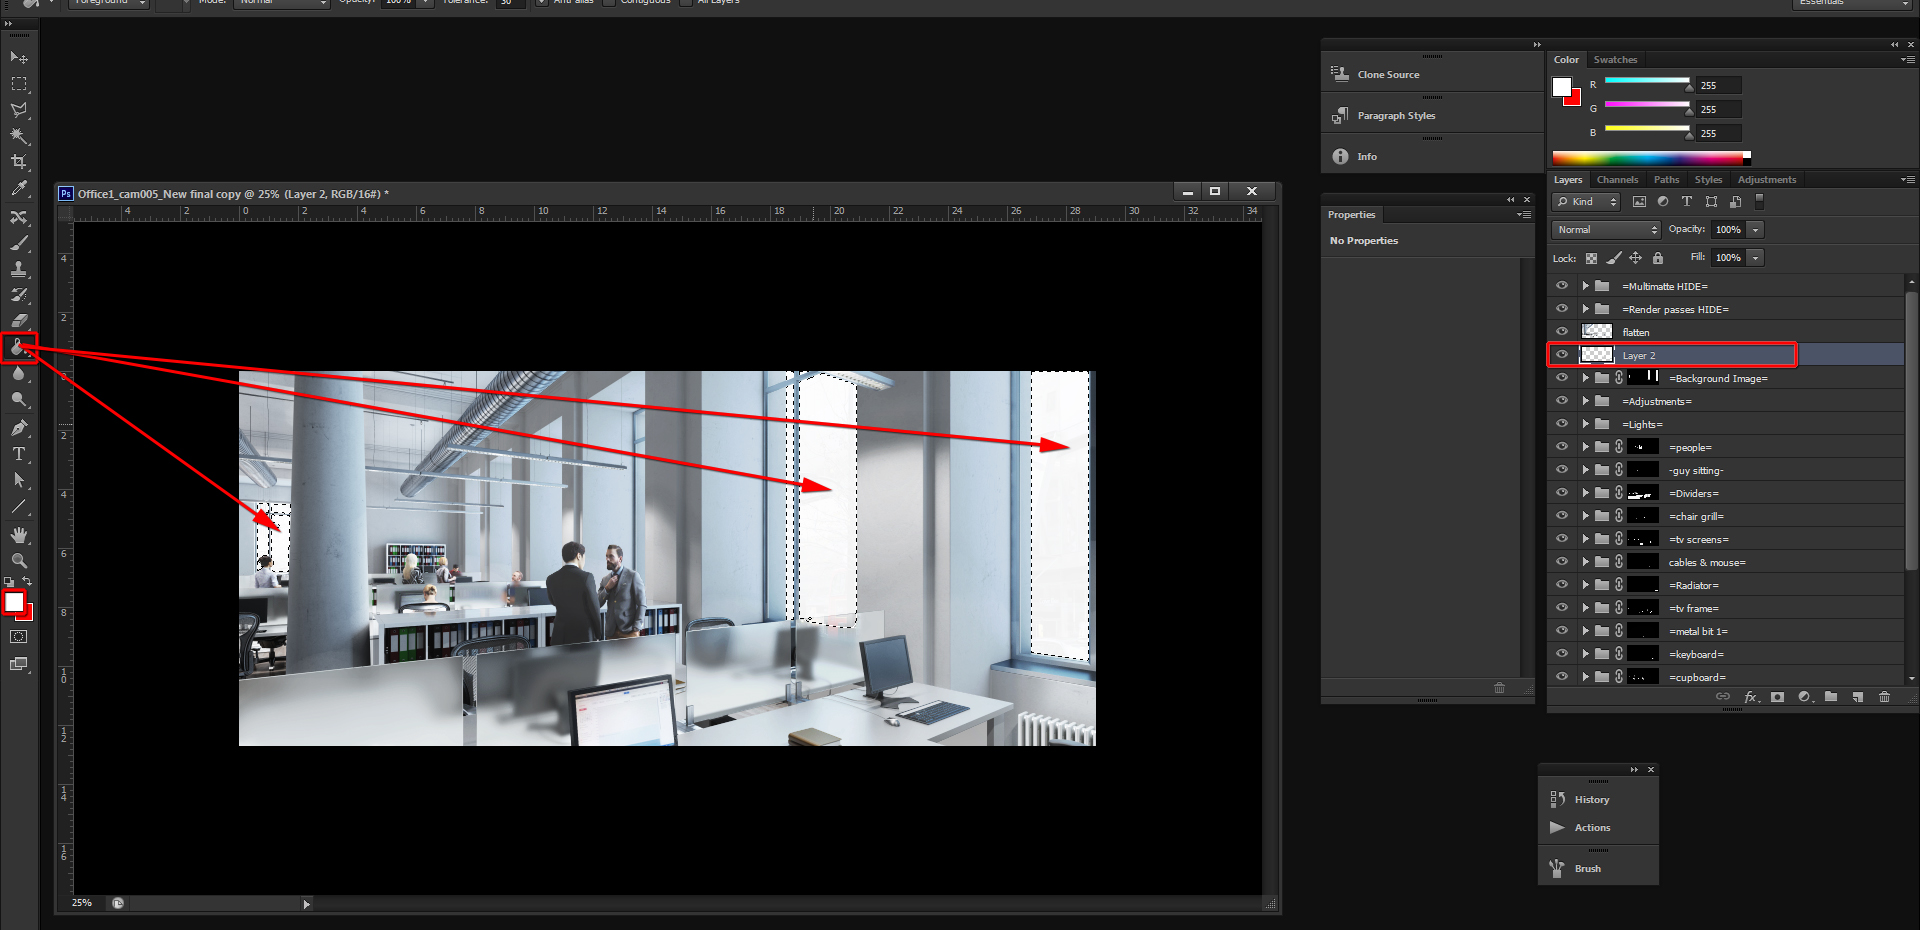
Use the Paint Bucket tool on the selected layer
Press Ctrl+d to deselect; and convert the new layer to into a smart object.
Convert to Smart object
While the layer is still selected, click the Filter tab and choose the Gaussian Blur, from the dropdown list.
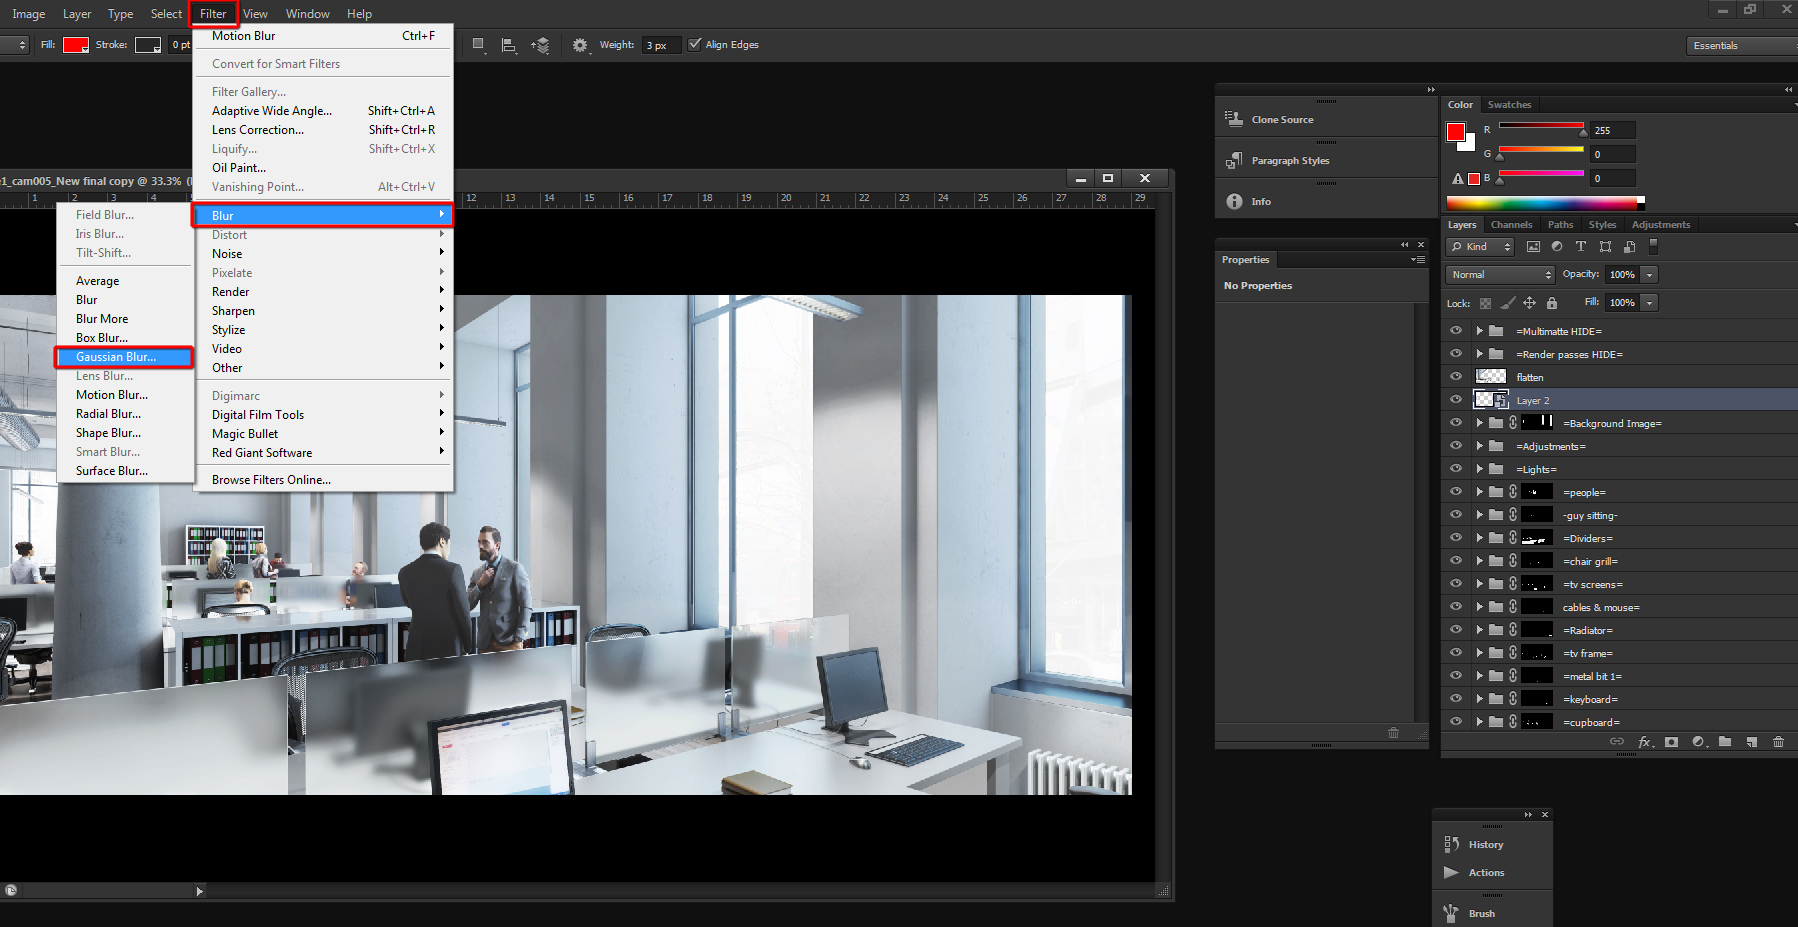
Choose the Gaussian Blur
To help the “glow” effect appear more realistic, choose the Overlay blending mode, and reduce its Opacity to about 50%, if desired.
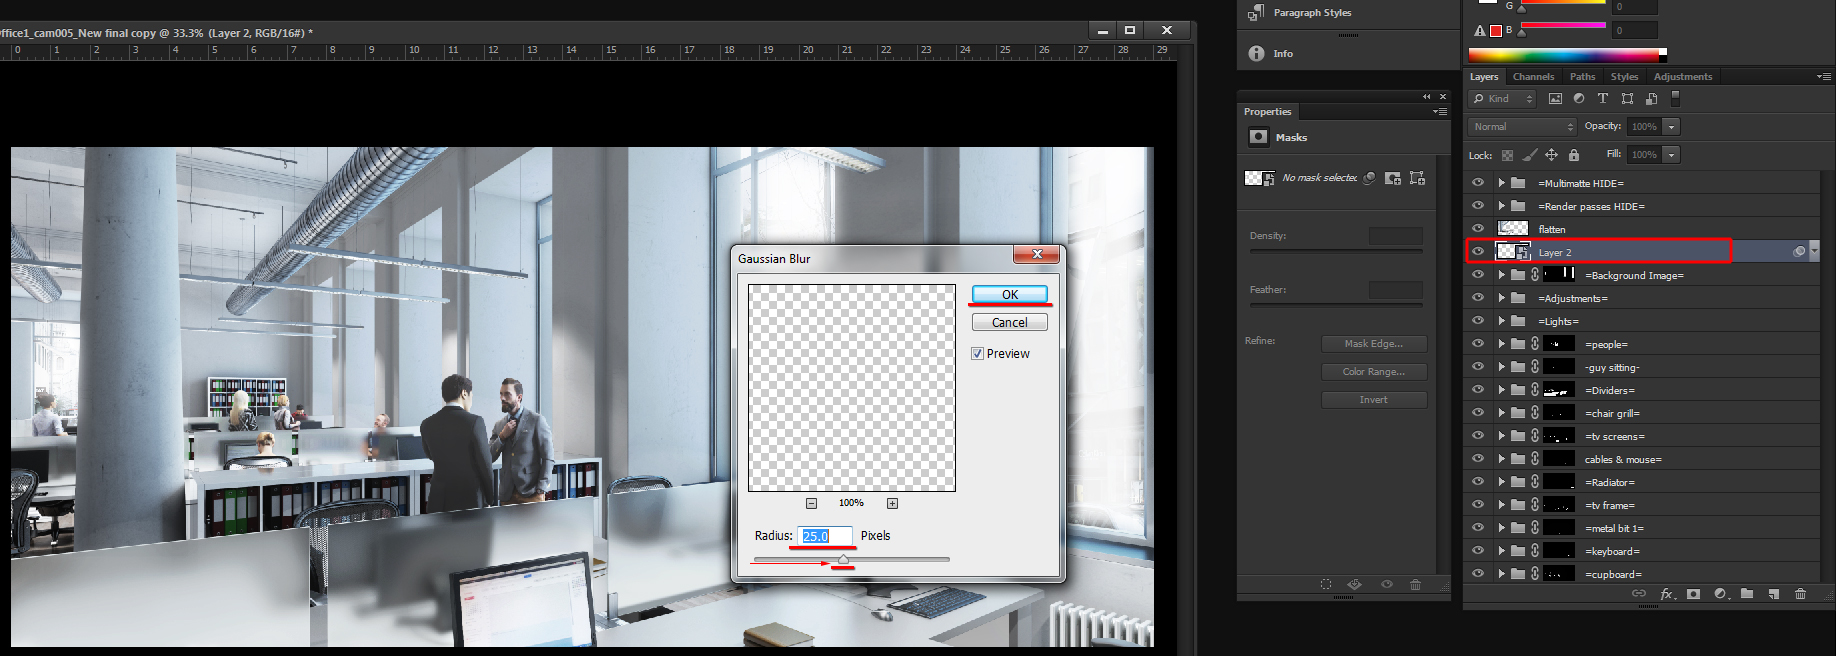
Overlay and reduce the layer Opacity to 50%
After few tweaks, the before and after results looked as the following:

Before

After
One can also add reflection passes to the window glass
For more detailed info on how to use render elements in post, please check the following tutorial:
Photoshop Post Production Tutorial
Exclusively for Gobotree – Jamie Cardoso


