
In 3d visualisation, there are times when clients may only have images of their original drawings to be used as the basis to model from.
The following tutorial will take users through the process of using images with drawings to model in 3ds Max.
in addition, users will quickly learn how to use key 3ds max tools and settings to prepare and scale an image accurately.
Users will learn how to:
- Use the image dimensions to recreate its proportions in 3ds Max
- Use the Viewport settings to display the textures more accurately
- Pinpoint the correct size of one object in the drawing
- Use the Tape helper to set its length in the scene
- Use and snap the object pivot point to set the base of the scale
- Scale objects proportionally to match a real world size
- Convert PDFs into DWGs

Right click and choose Image Size option
Let’s start by opening the relevant image/images in Photoshop; followed by right clicking on the edge of the document, and choosing the Image Size option.

Choose the document Size dimensions in Millimetres
The Image Size dialog should be prompted. In the Document Size group, set its units to millimetres.
This system unit was chosen because I often work in millimetres. However, feel free choose
whatever unit you feel more comfortable working with.
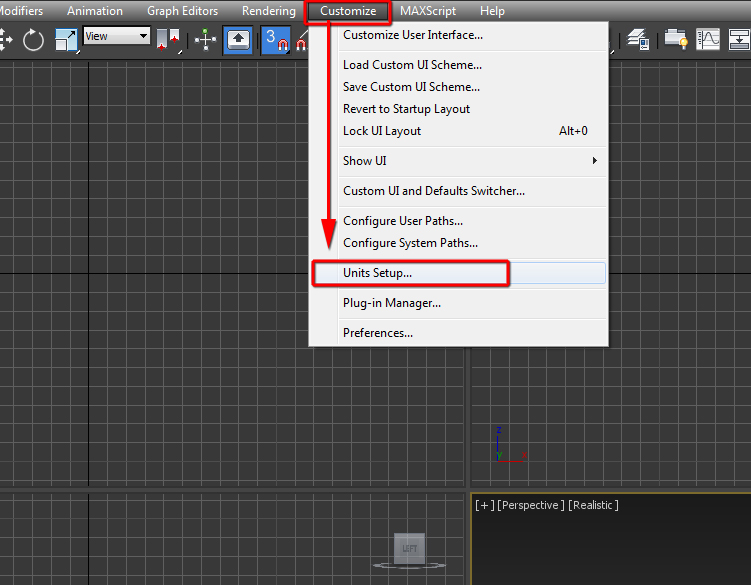
Choose the Units Setup from the Customize list
In 3ds Max, go to Customize main toolbar and choose the Units Setup from its dropdown list.
In Units Setup dialog, under the Display Unit Scale group, choose the Metric system to be in Millimetres.
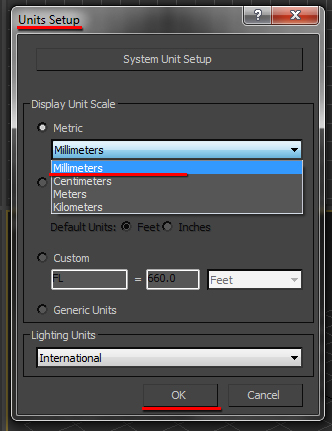
Change the Metric unit to Millimetres
In the create panel, under shapes, select a Rectangle followed by clicking and dragging the shape in the Front viewport to create it.
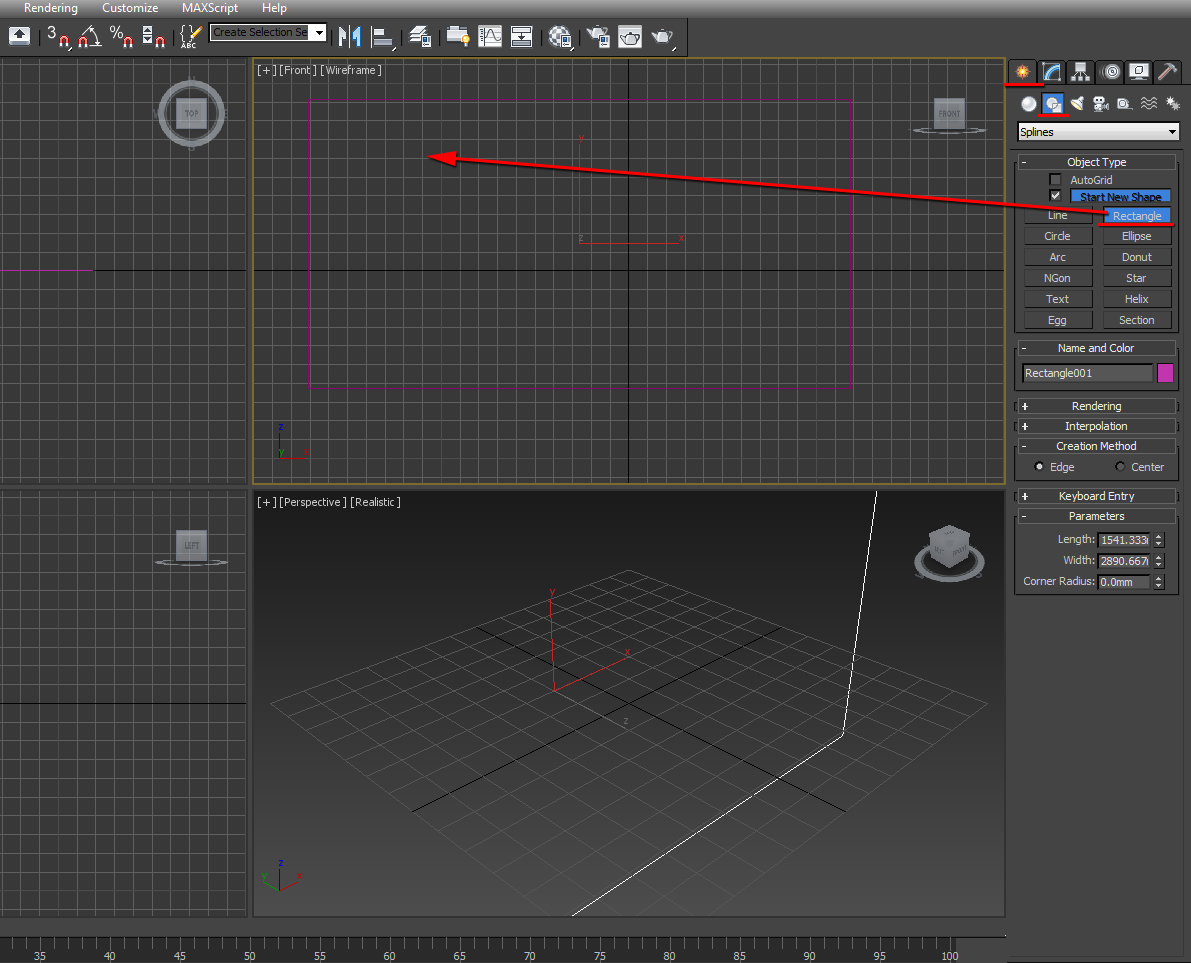
Create a rectangle shape
The next step is to open the Modify command panel while the Rectangle is still selected. In the Rectangle Length and Width parameters, type in the dimensions of the document seen in Photoshop. Alternatively, simply copy and paste the values.
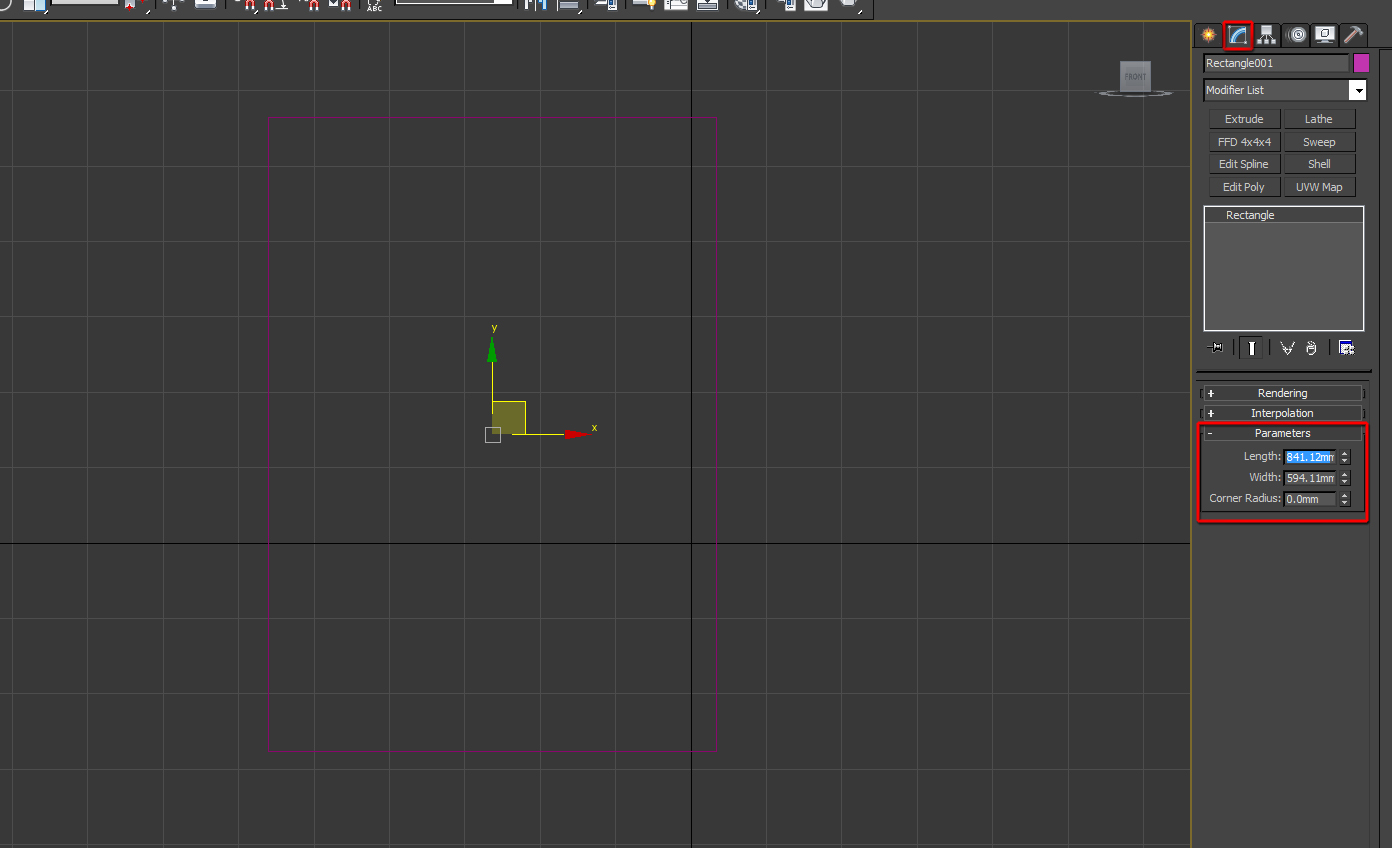
Type in the Length and Width Parameters
Apply the Extrude modifier to add some thickness to the shape, followed by applying the UVW Map modifier.
Ensure to enable the Box mapping mode and click on the Fit button to adjust UVW Map.
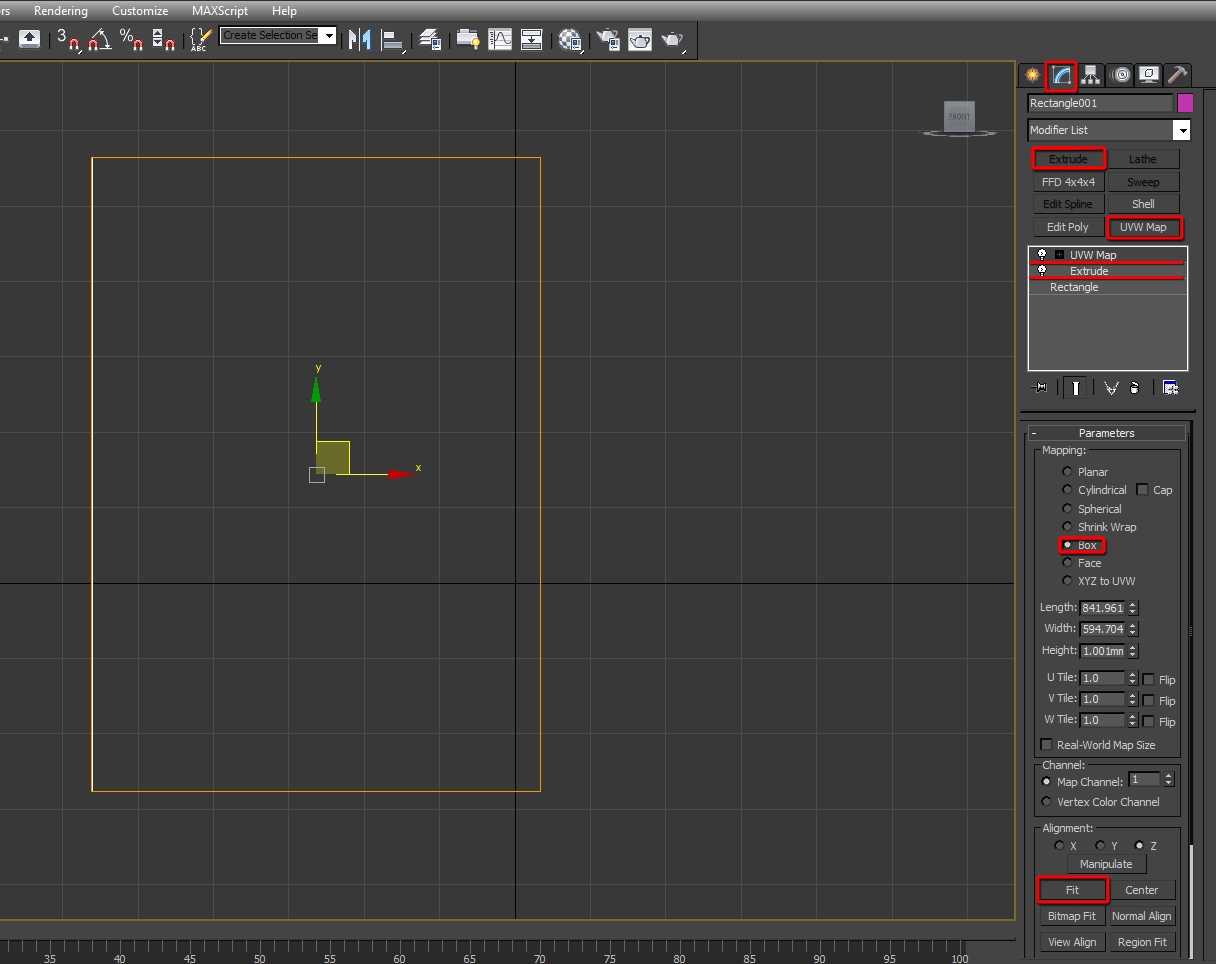
Apply the Extrude and UVW Map modifier
The following step is to apply/assign the dwg image/bimap onto the Rectangle, and turning the viewport display type to shaded.
Also, enable the, Show Shaded Material in Viewport button.

Assign the DWG Image/ Bitmap to the Rectangle
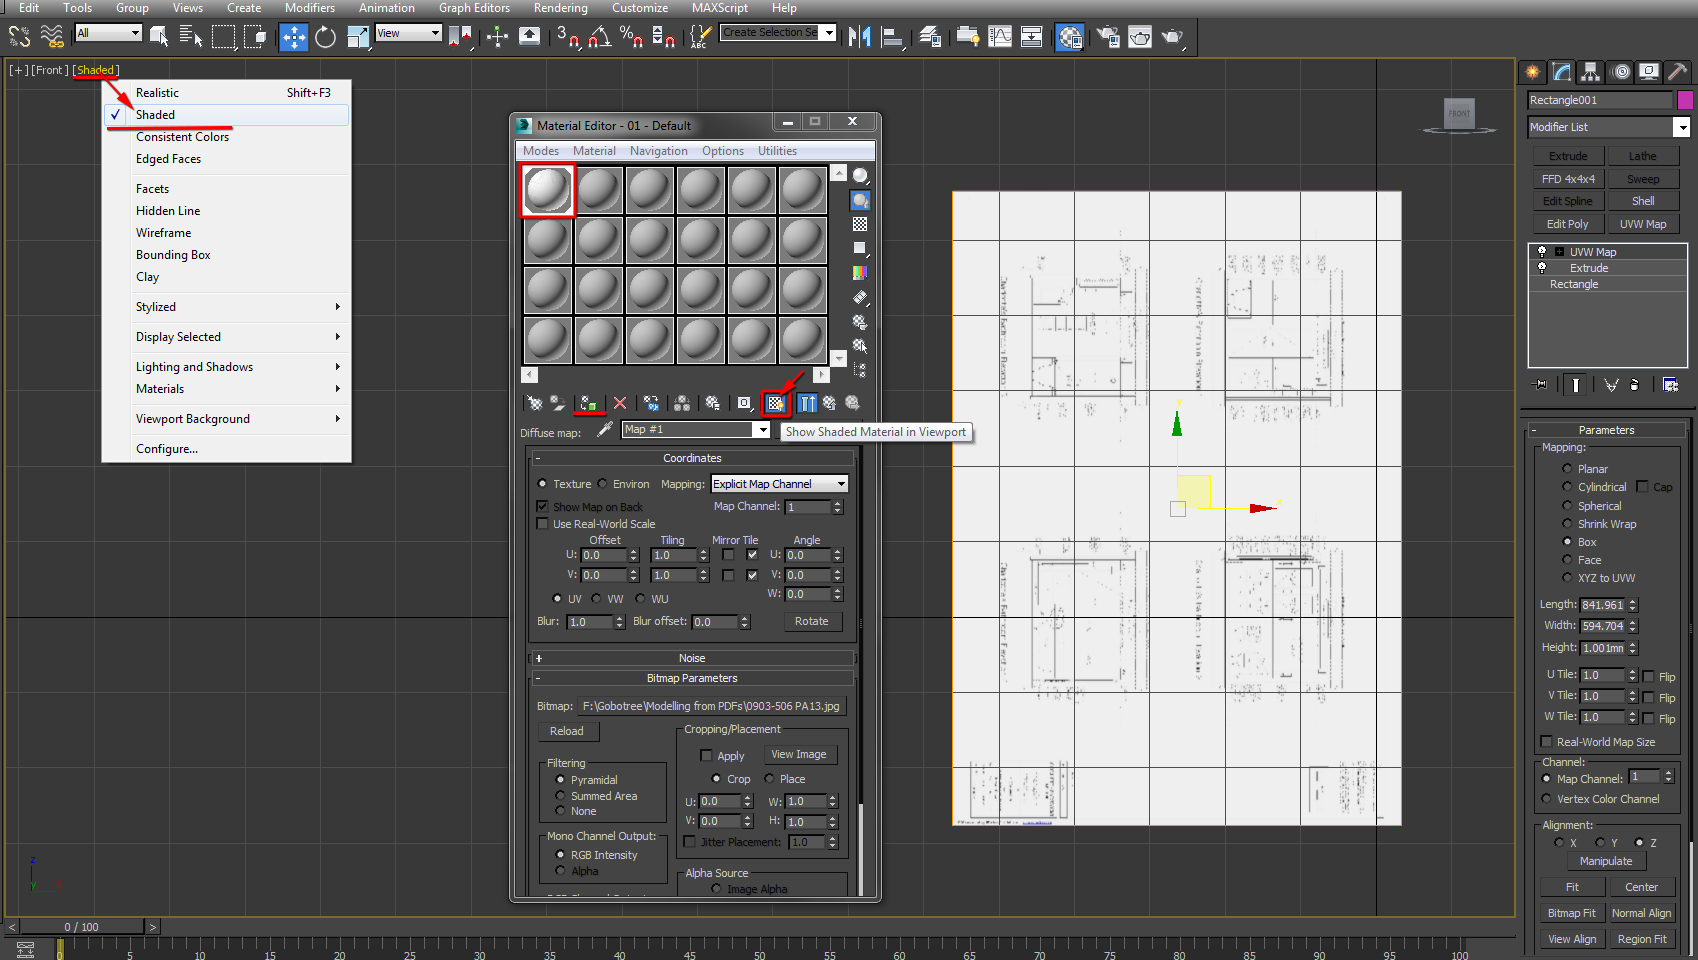
Show Shaded Material in Viewport button enabled
The texture/image applied looks slightly blurry in the viewport. To correct this, simply press Alt+B to open the Viewport Configuration dialog.
In the Display Performance tab, set the Texture Maps to 6000 pixels; followed by clicking Apply and OK to close the dialog.
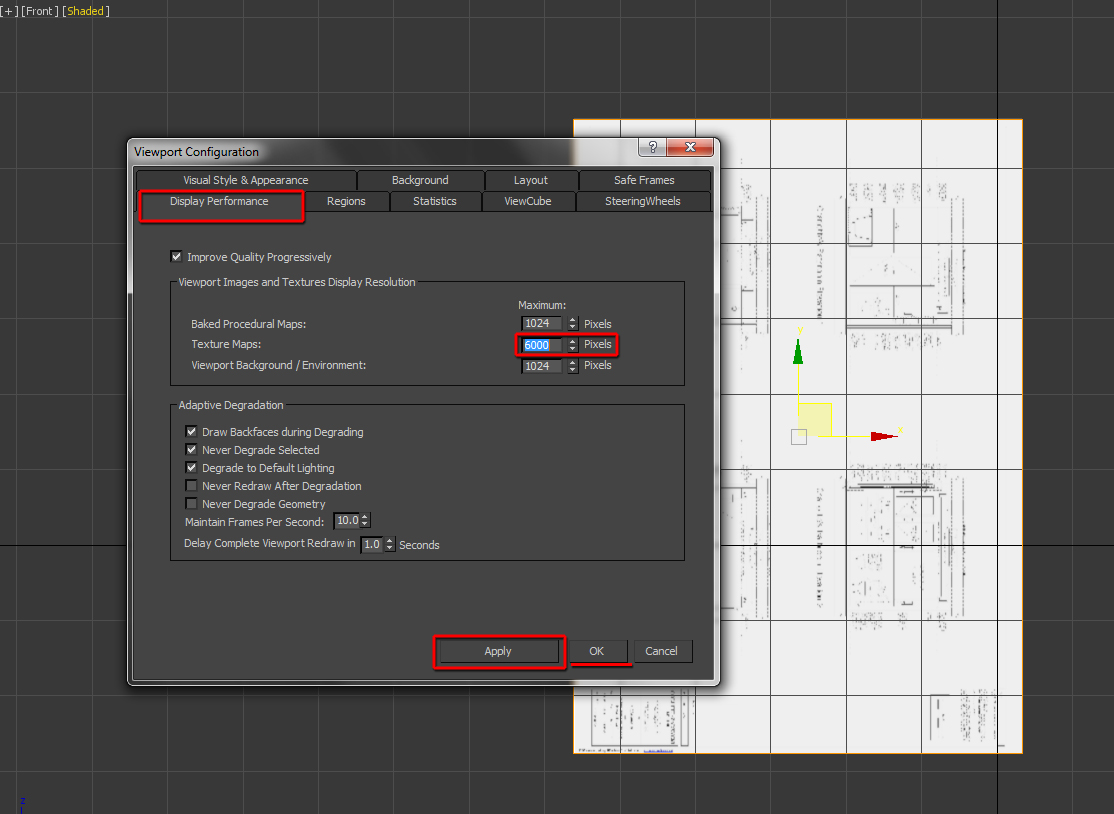
Open the Viewport Configuration dialog
Next, click on the Shaded viewport text to and choose the, Realistic Materials with Maps option, from its dropdown list .
Repeat the same action, and choose the, Shaded Materials with Maps option.
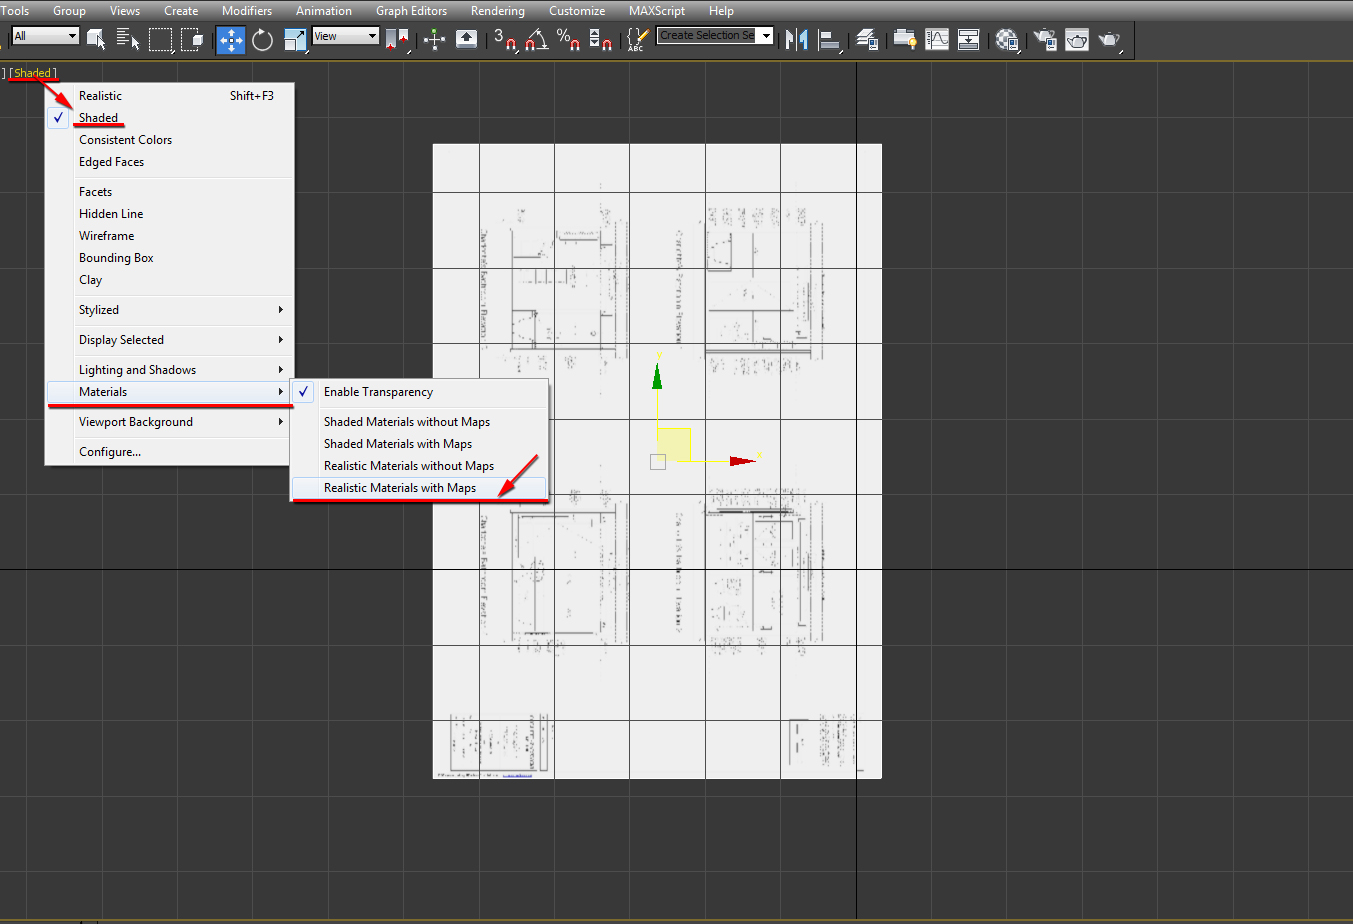
Choose the, Realistic Materials with Maps option
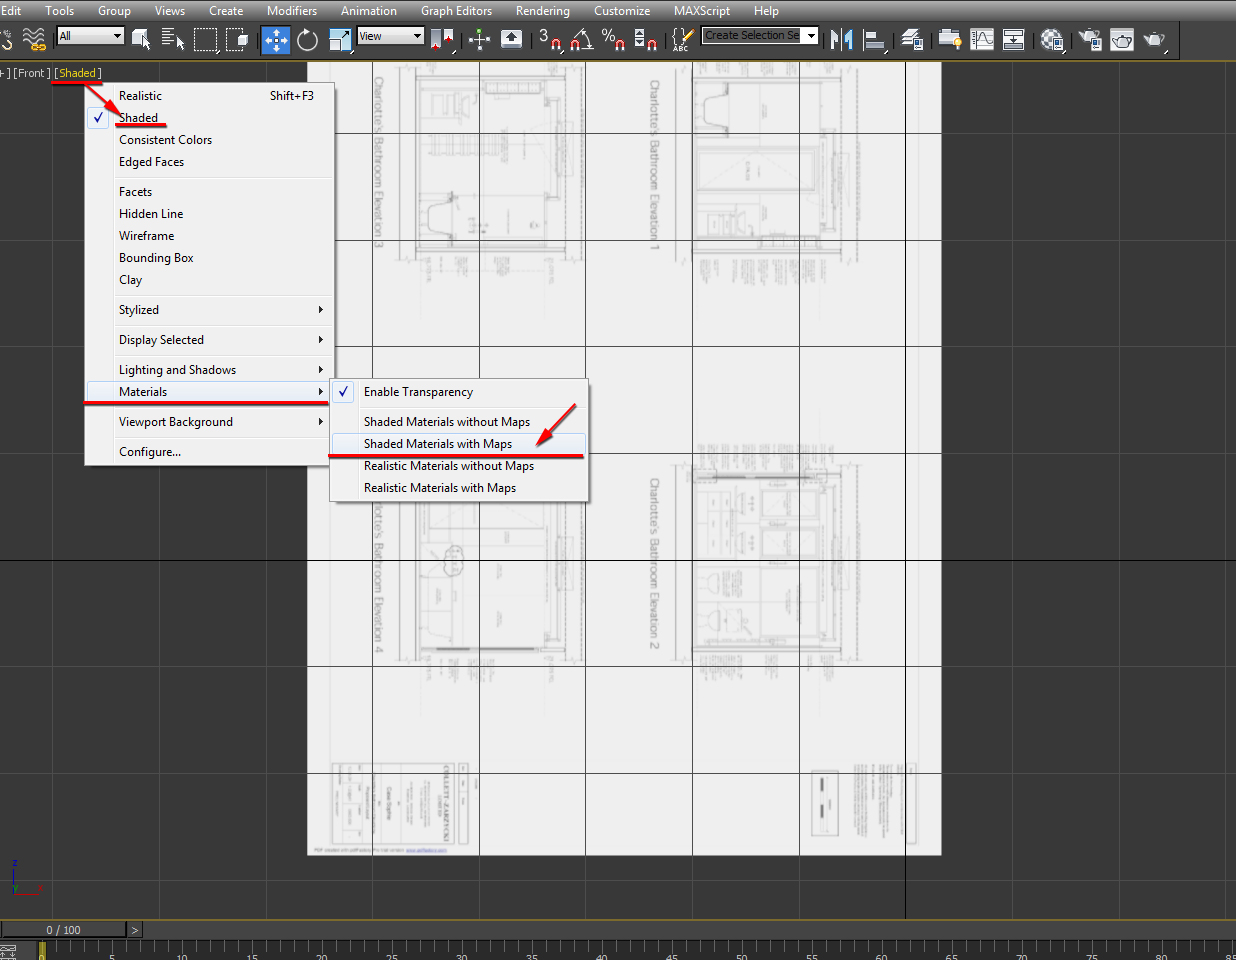
Choose the Shaded Materials with Maps option
The texture display should look more precise/realistic in the viewport. Before we begin scaling up
the rectangle to fit the dimensions of the of the drawing being displayed, we need to take a closer
look into drawing notes/text regarding dimensions.
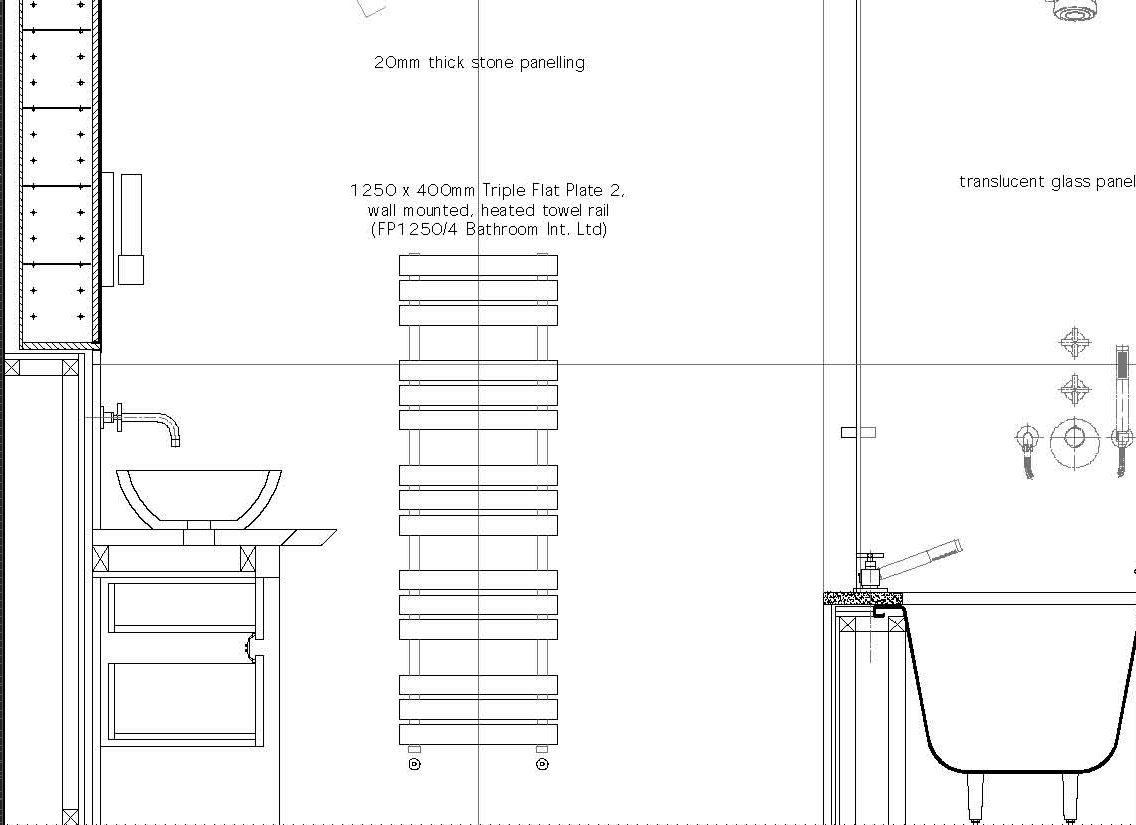
Drawing notes/text regarding dimensions
With a clear information about the dimension one object in the drawing, we can begin the process
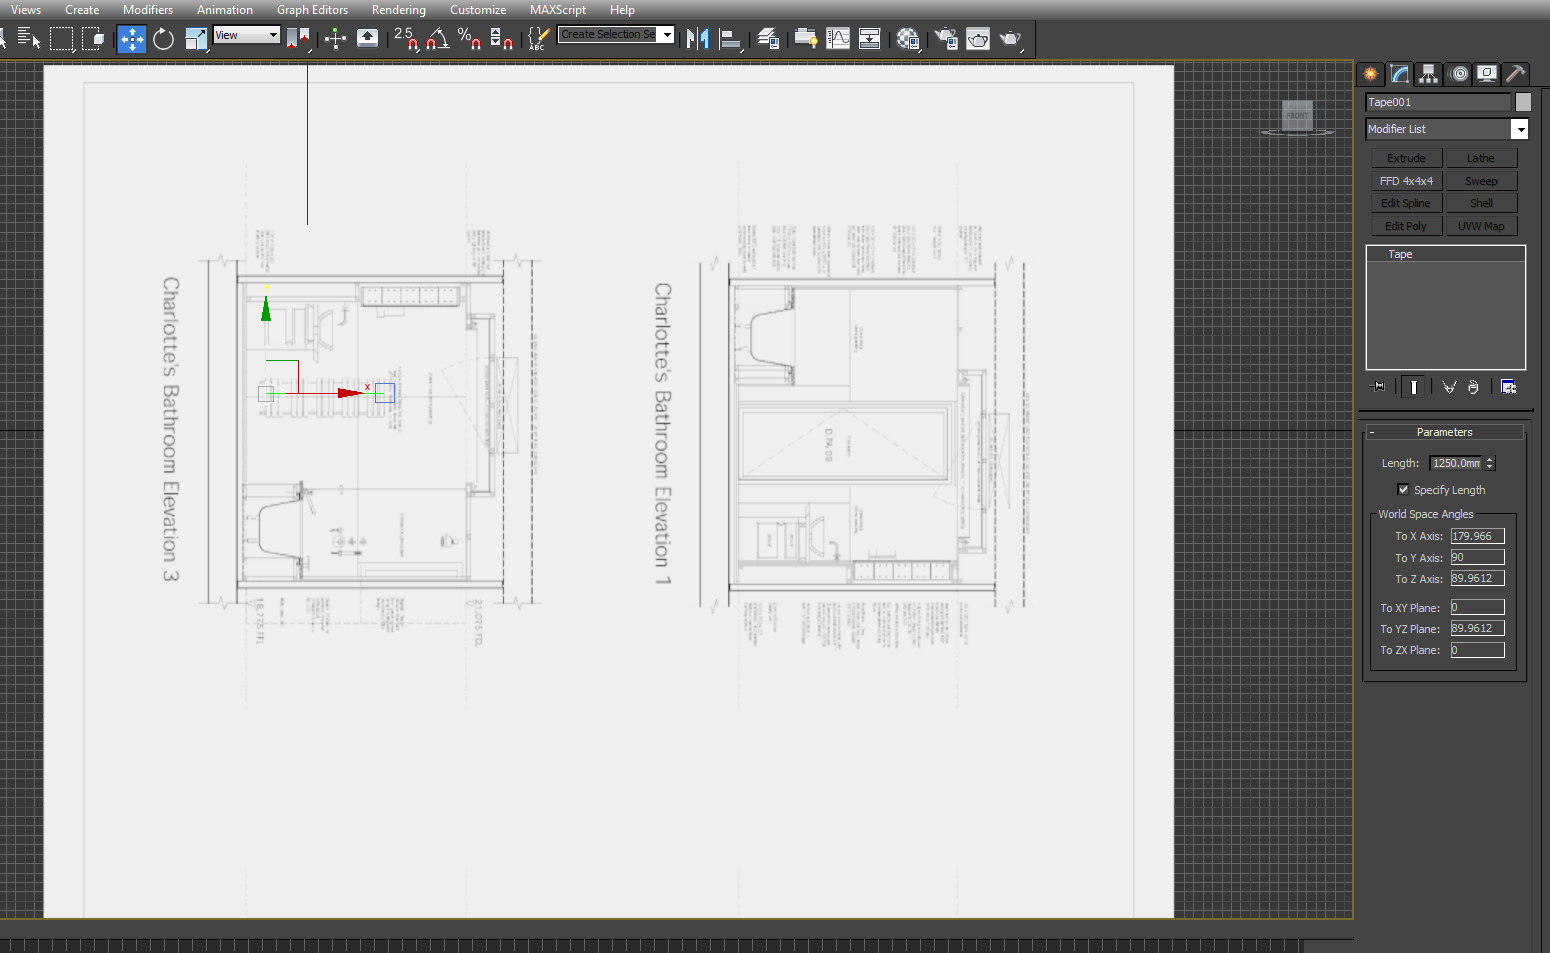
of scaling the rectangle proportionally. To do so, start by creating a Tape helper, with the
length/dimension(millimetres) described in the drawing (e.g. 1250x… millimetres).
To do, simply specify the length, followed by clicking and dragging the tape helper in the Front
viewport. In addition, place the Tape tool at the base of a specific area of a drawing to be later
scaled from.
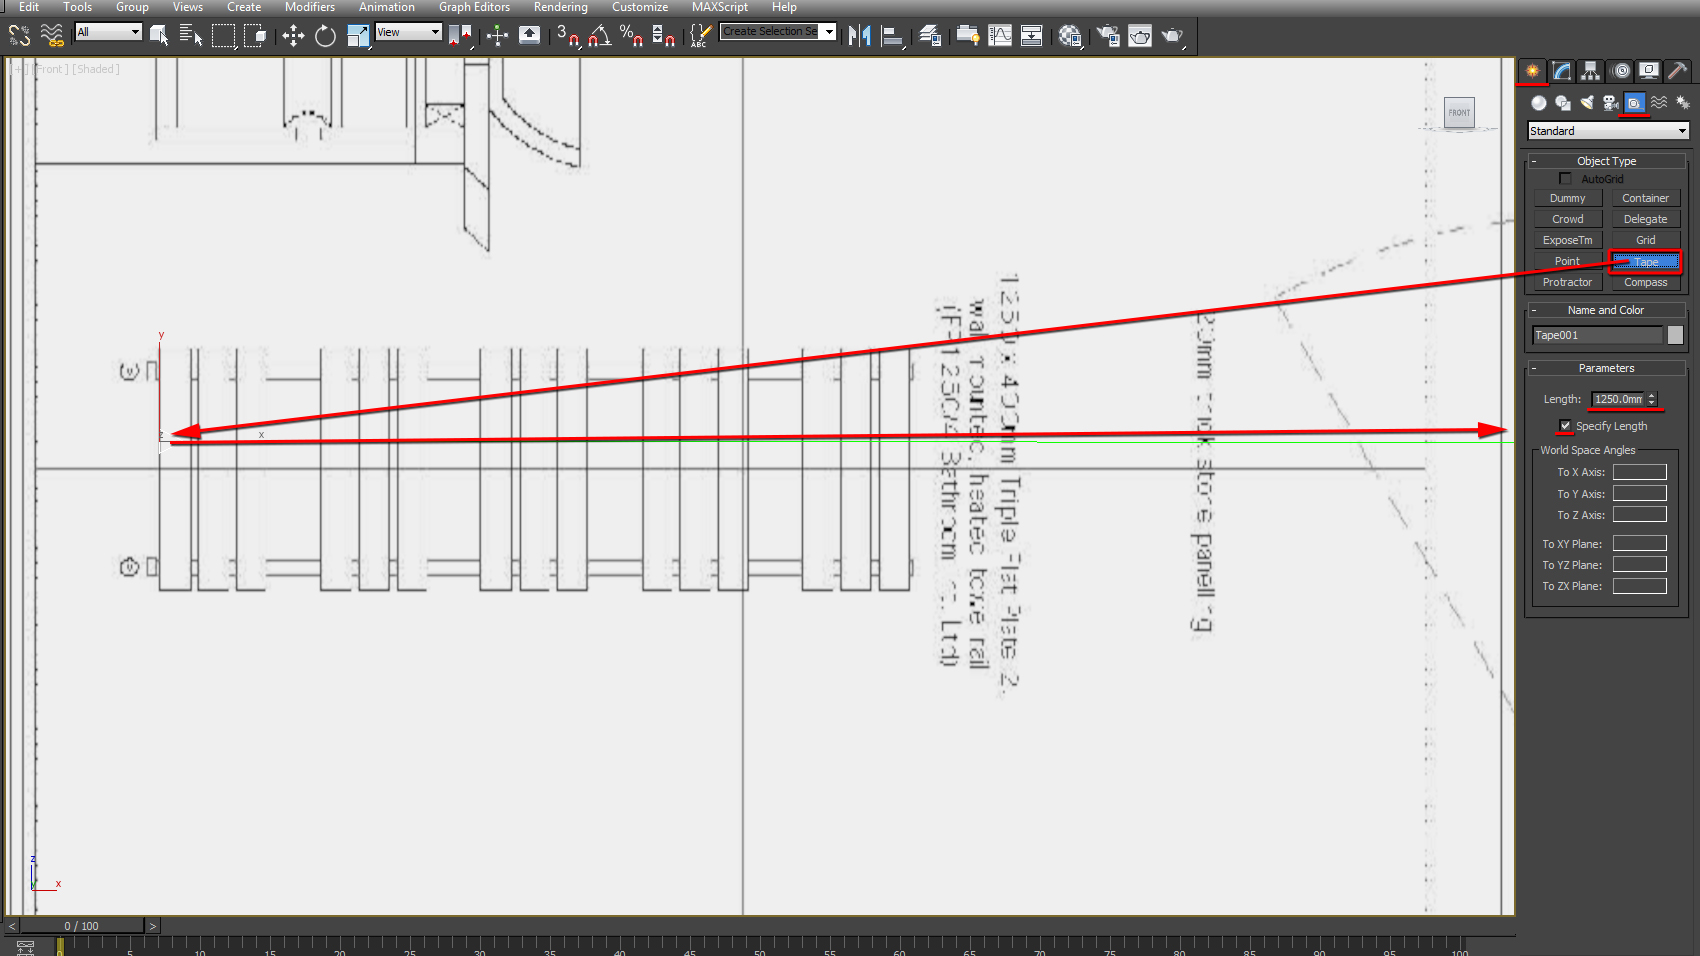
Create the Tape helper in the viewport
To ensure the scaling starts from the base of a specific area of a drawing, open the Hierarchy command panel; enable the Pivot button and click on the, Affect Pivot Only.
The Pivot gizmo should appear at the centre on the Rectangle. Move the Pivot point to where the base of the Tape tool is located. To do so, start by clicking on the Move tool and enable the snap tool (S) ; followed by dragging and snapping the Pivot point/gizmo to the base of the Tape tool.
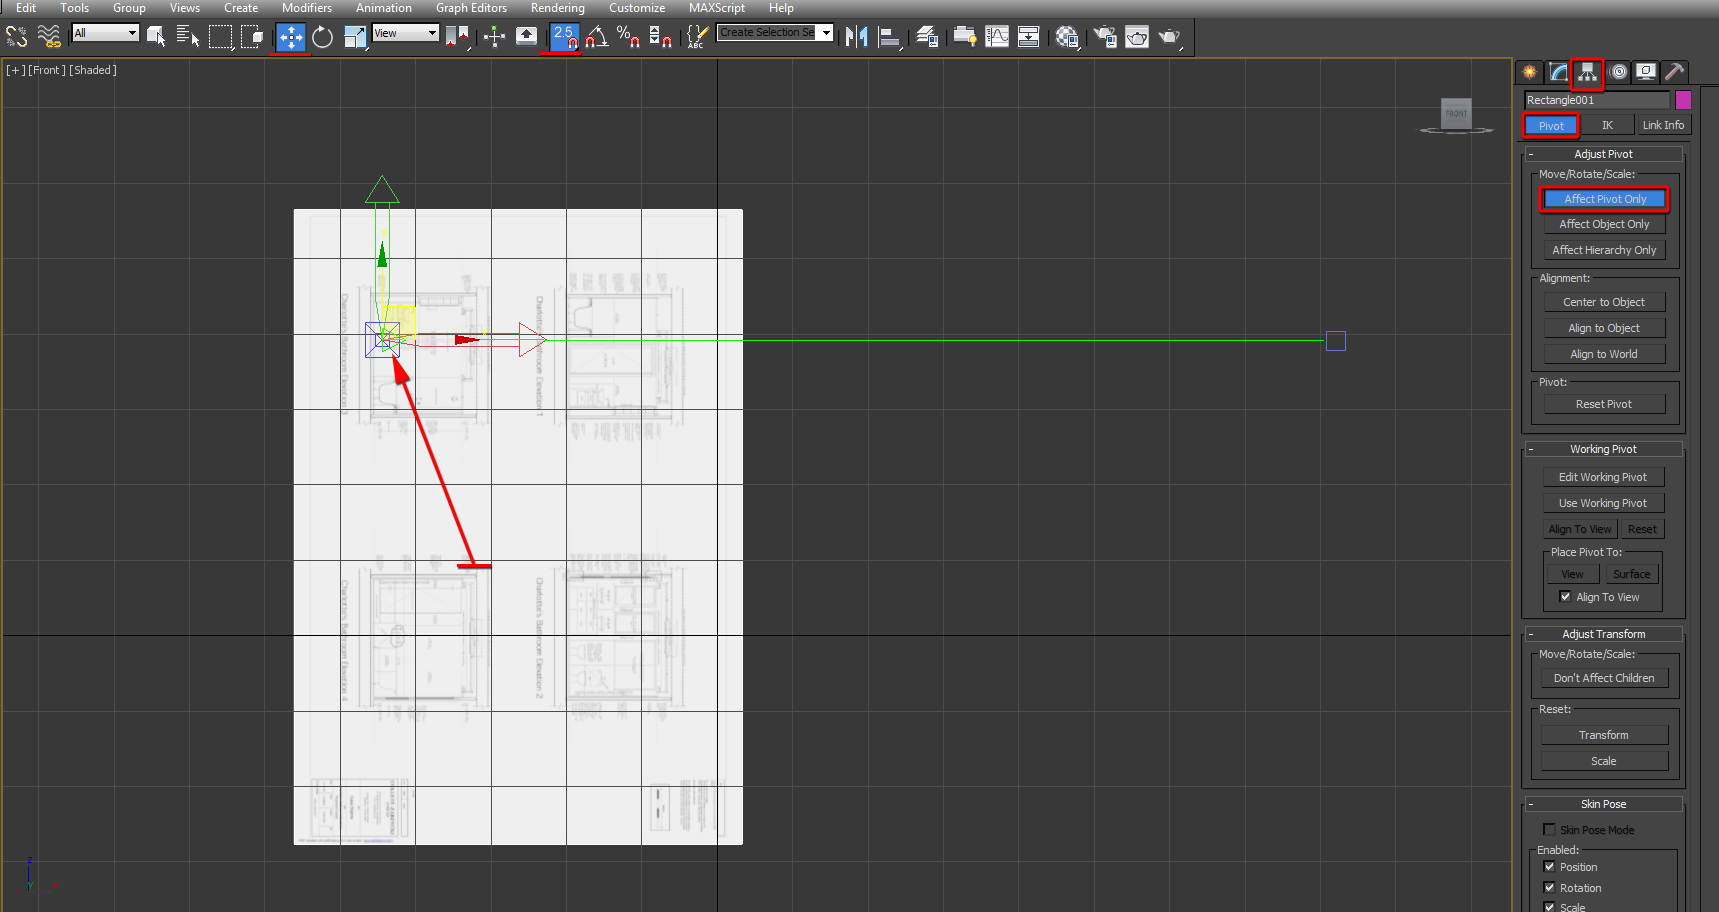
Move/snap the Pivot point
Next, select the Rectangle object; enable the Scale button in the main tool bar (Select and Uniform Scale) and right click on it to bring up its dialog.
Begin scaling up the rectangle proportionally with the spinner, until the size of the object in the drawing matches the length of the Tape tool (e.g. 1250 millimetres).

Scale up the Rectangle proportionally
Scale matched
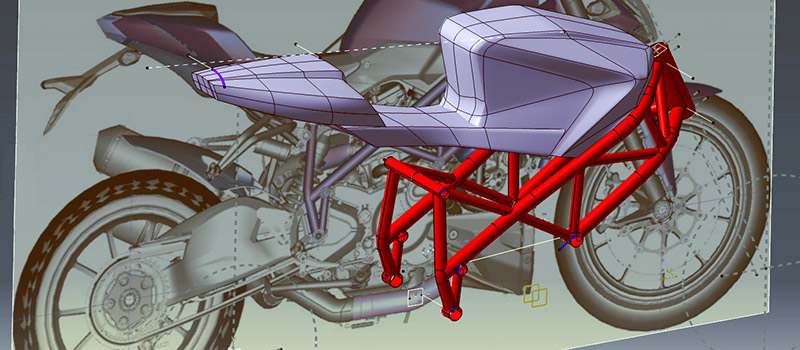
With the drawing scale matched properly, you can begin modelling up the scene.
Converting PDF drawings into DWGs
There are often cases when these drawings will come as PDFs. In such instances, simply go to the following website to automatically convert the PDFs into DWGs.
http://dwg.autodwg.com/
To convert, simply upload your PDF file, followed by entering your email, the visual code, and clicking send.
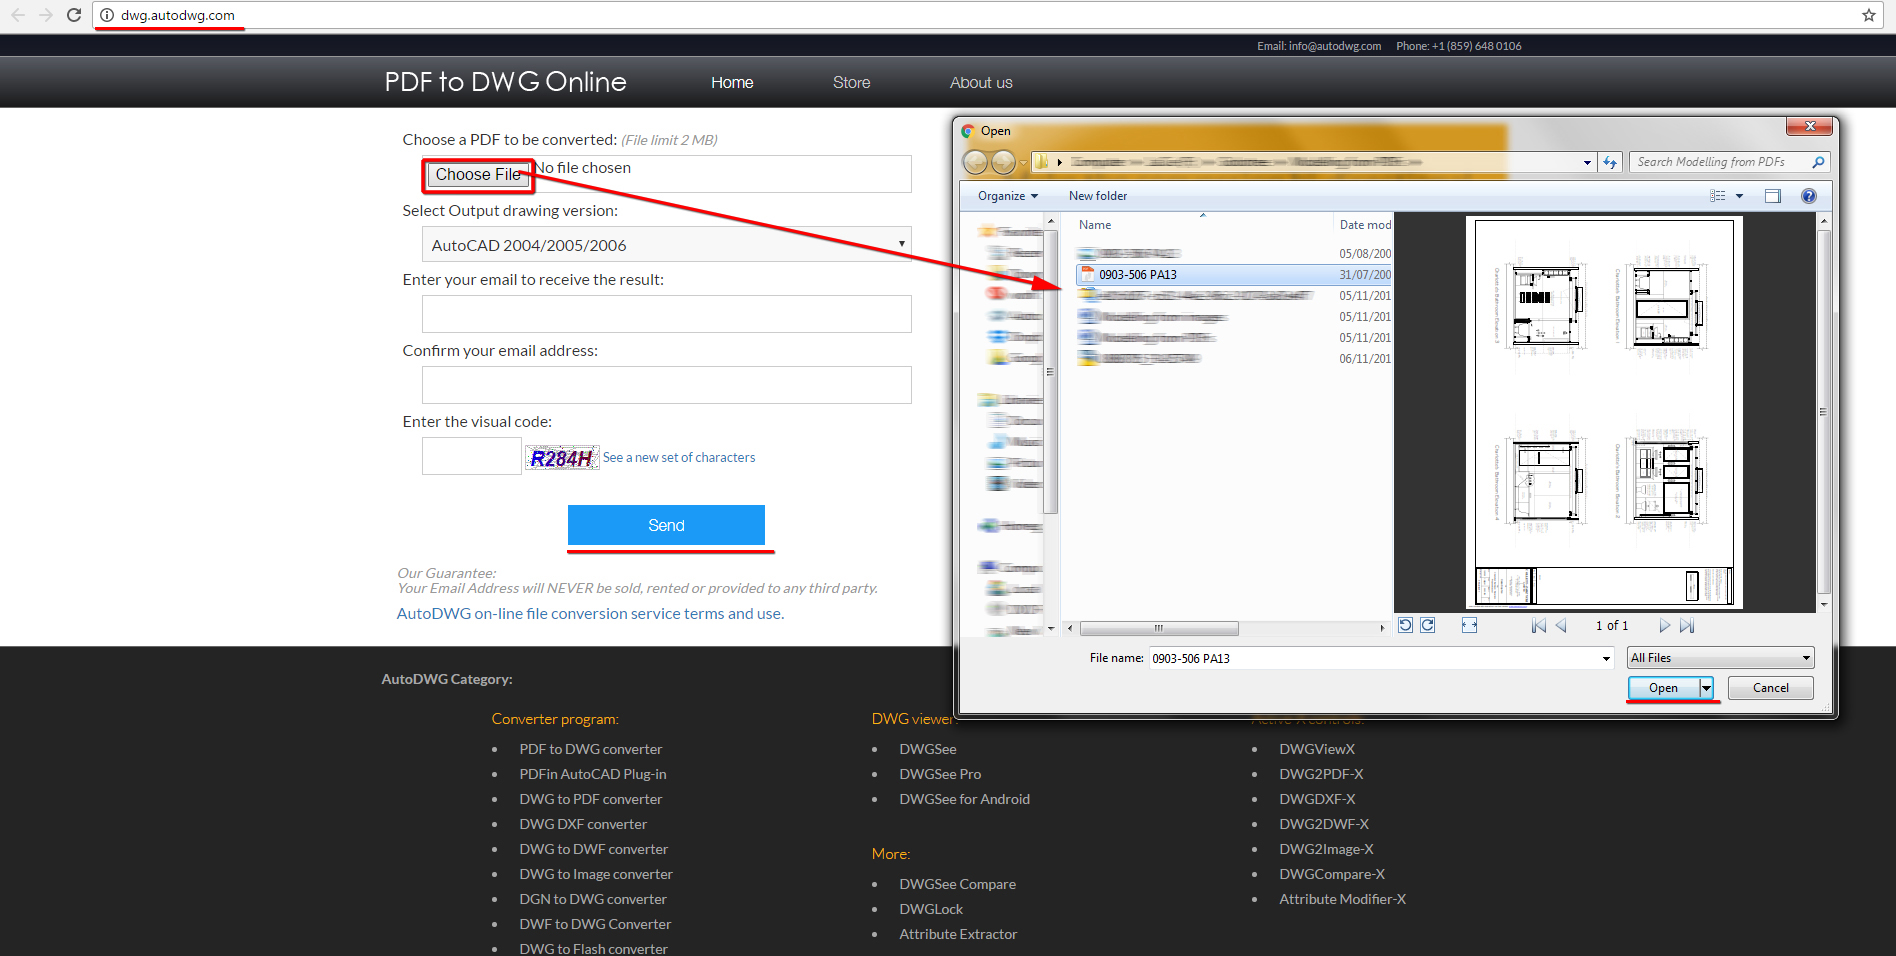
Upload and send your PDF
Once the conversion is completed, simply download it and import it into your 3ds Max file.
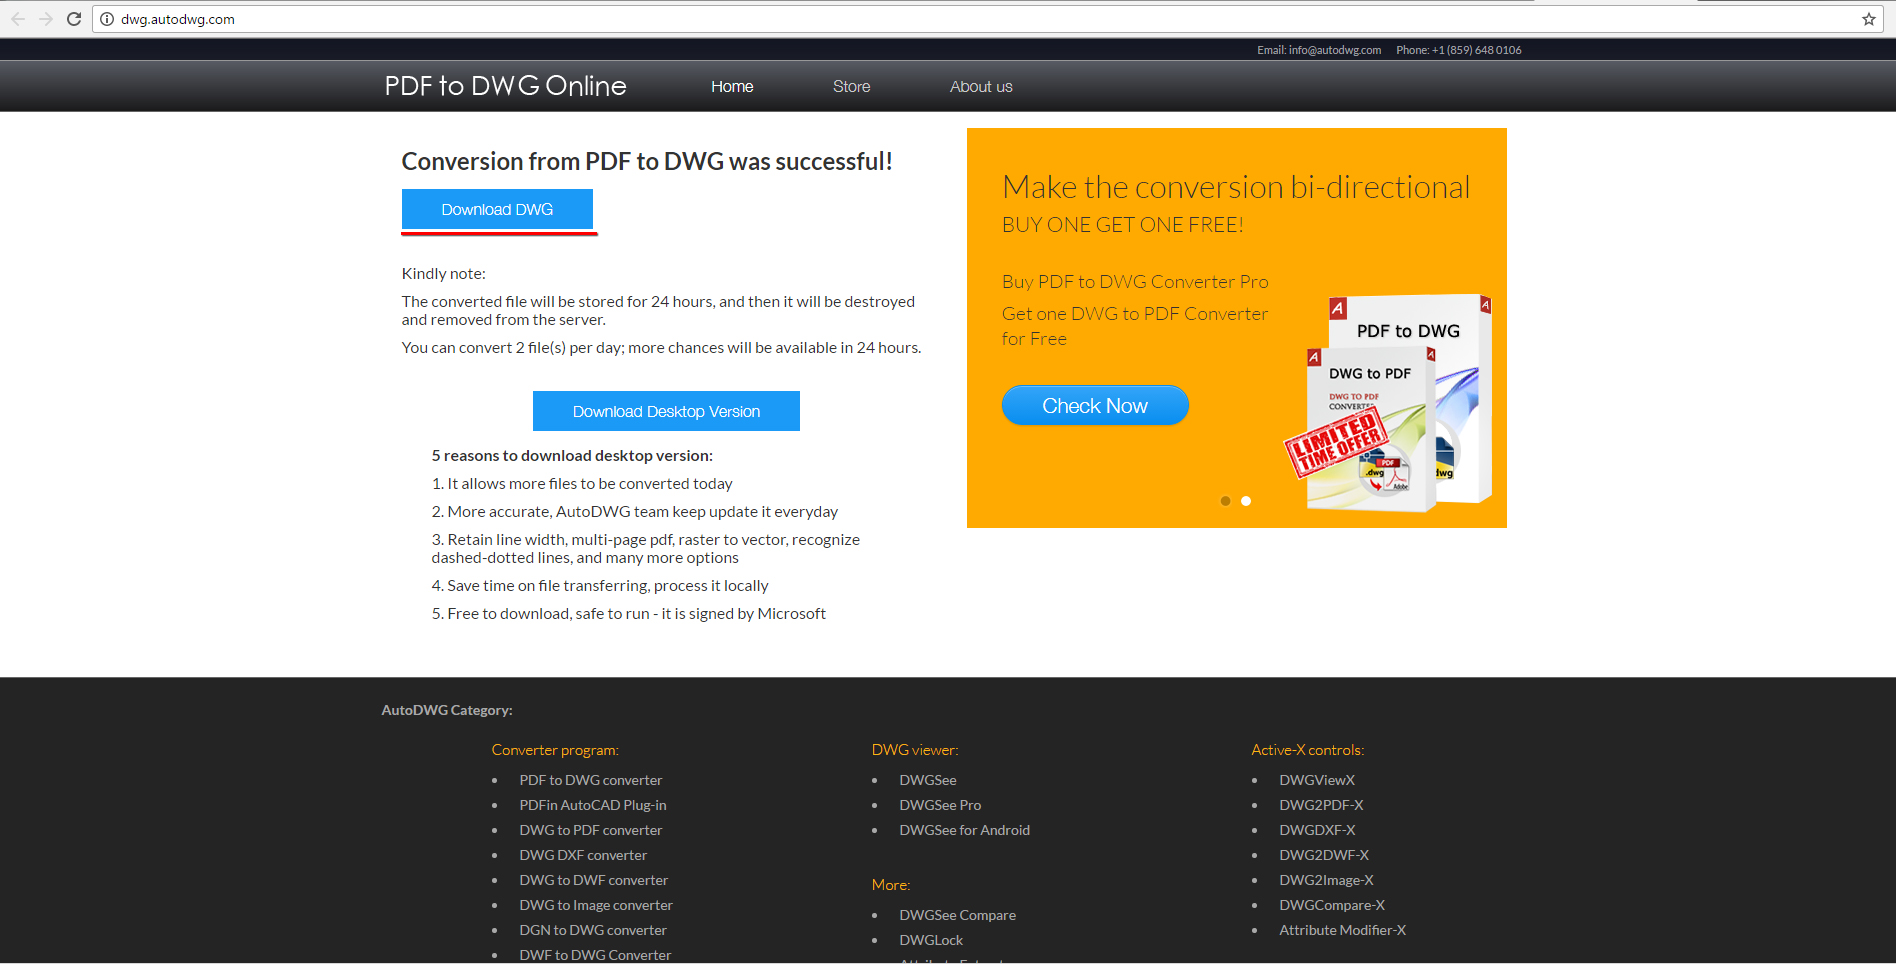
Download the converted file
Exclusively for Gobotree – Jamie Cardoso


